> ## Documentation Index
> Fetch the complete documentation index at: https://guides.robylon.ai/llms.txt
> Use this file to discover all available pages before exploring further.
# Robylon × Wix Integration: Add Chat to your site
> Install the Robylon chat widget on Wix. Add chat widgets, secure webhooks, and event tracking-without code.
### **Step 1: Generate and Copy Your Robylon Chatbot Embed Code.**
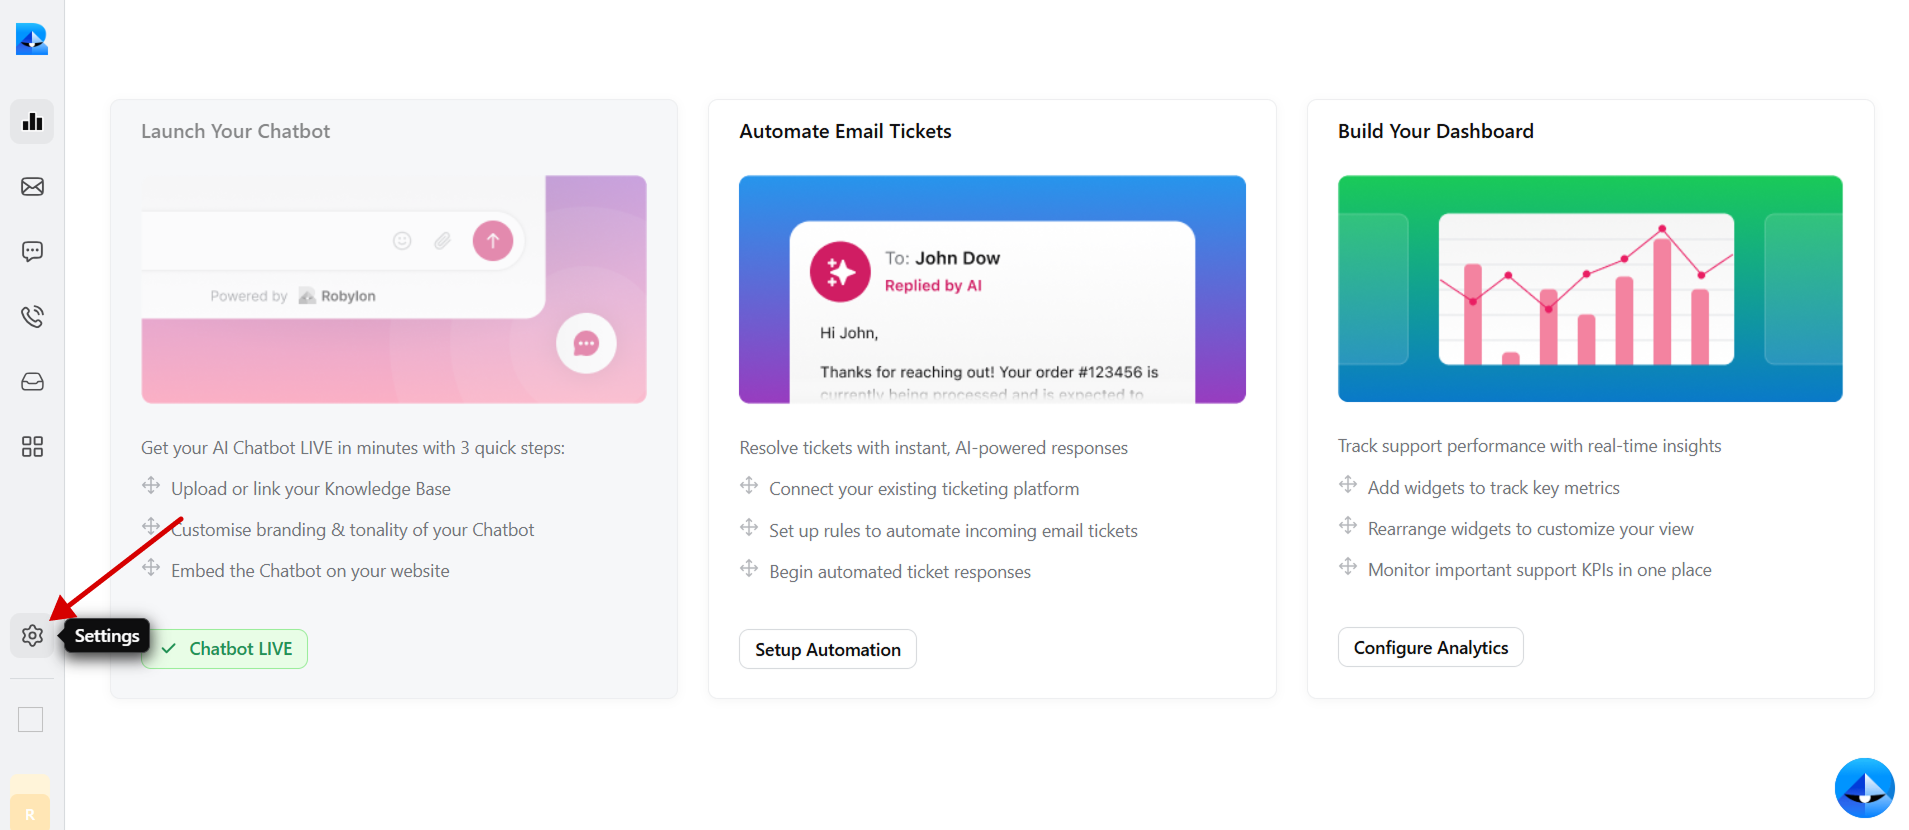
1. Log in to your Robylon account and open the dashboard.
2. In the left panel, click on the settings button to navigate to the settings page.
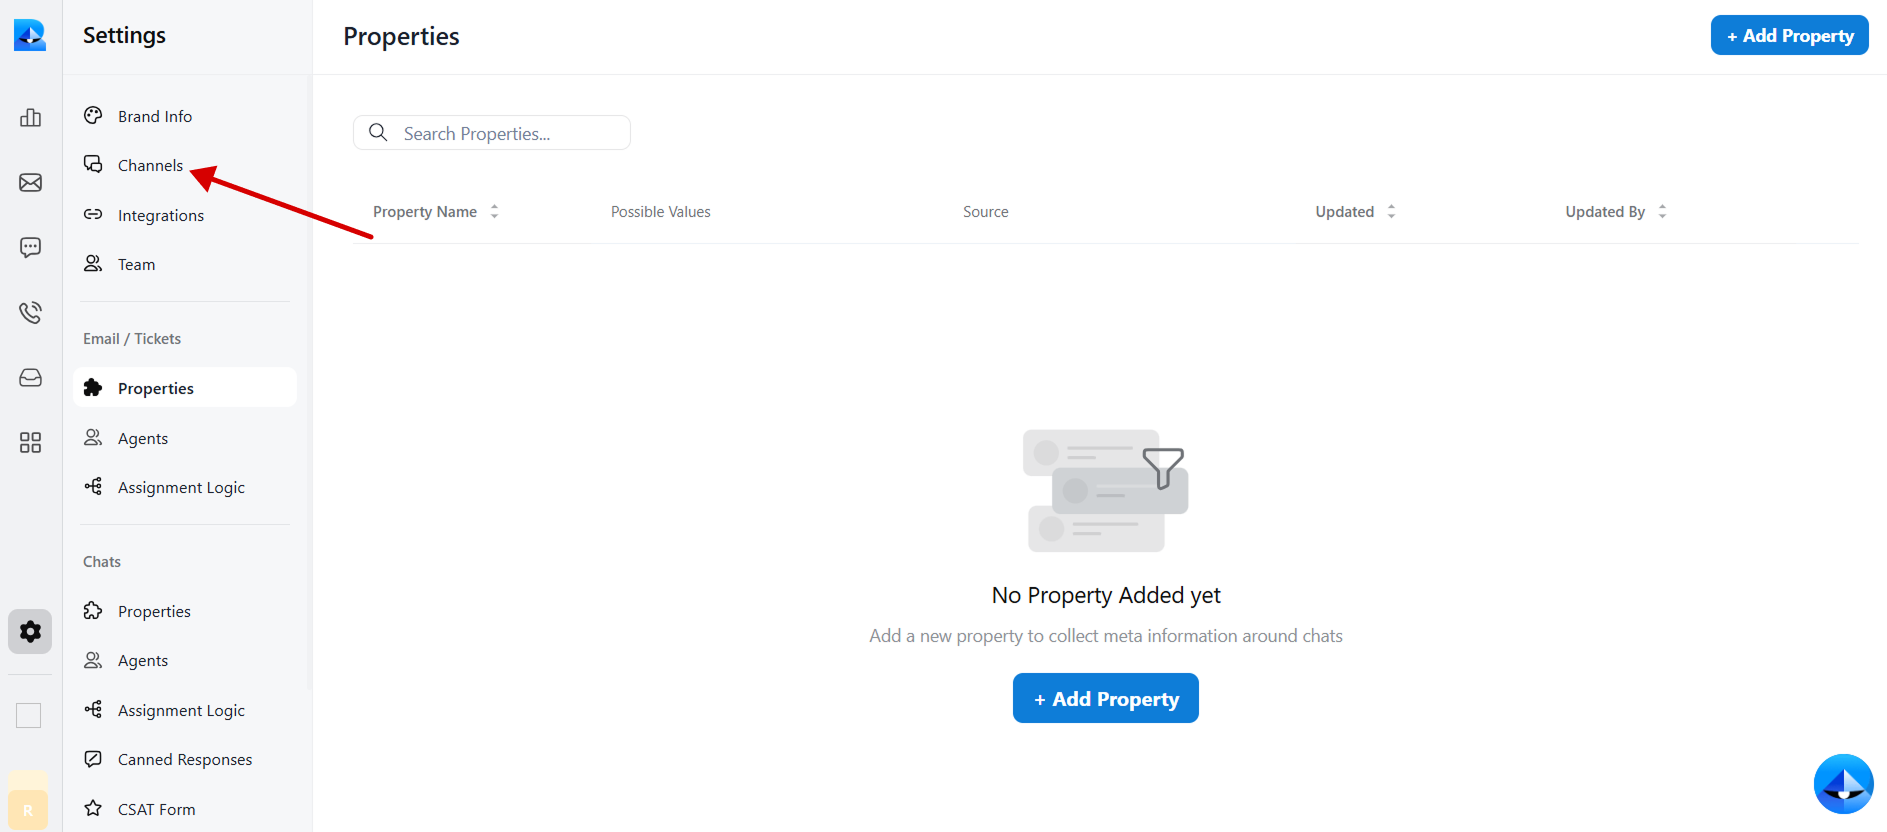
 3. Within the settings tab, select [Channels](https://app.robylon.ai/settings/channels).
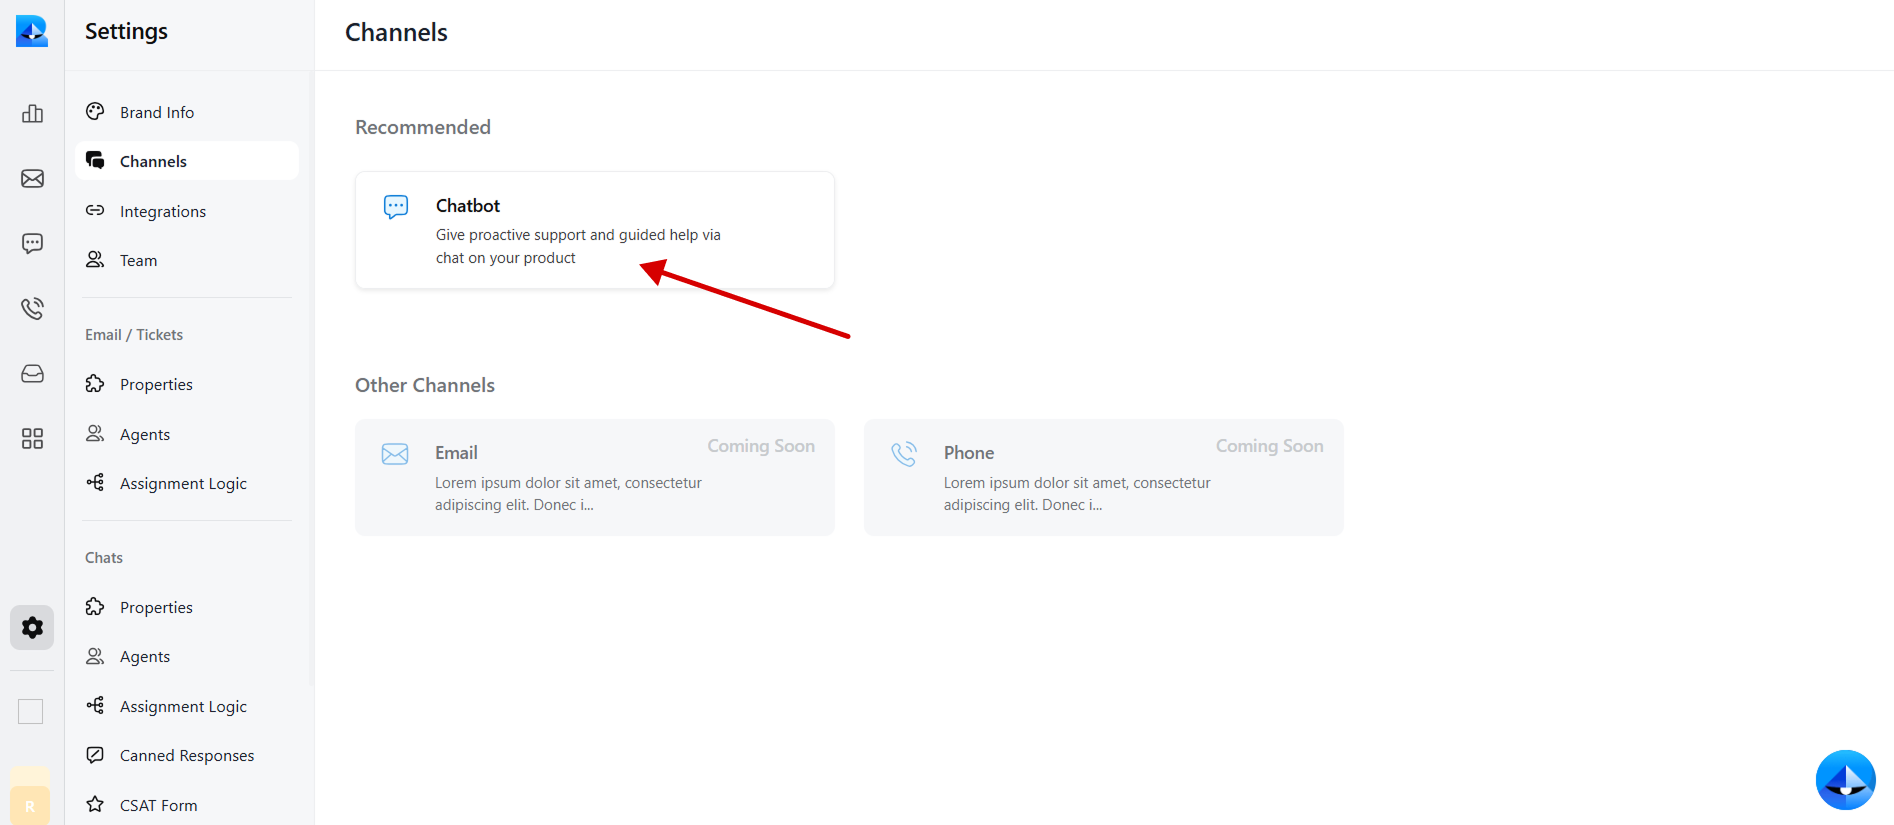
 4. Click on the [Chatbot](https://app.robylon.ai/settings/channels/chatbot/interface) widget to access the chatbot details.
 5. Navigate to the [Install](https://app.robylon.ai/settings/channels/chatbot/install) tab within the chatbot details page.
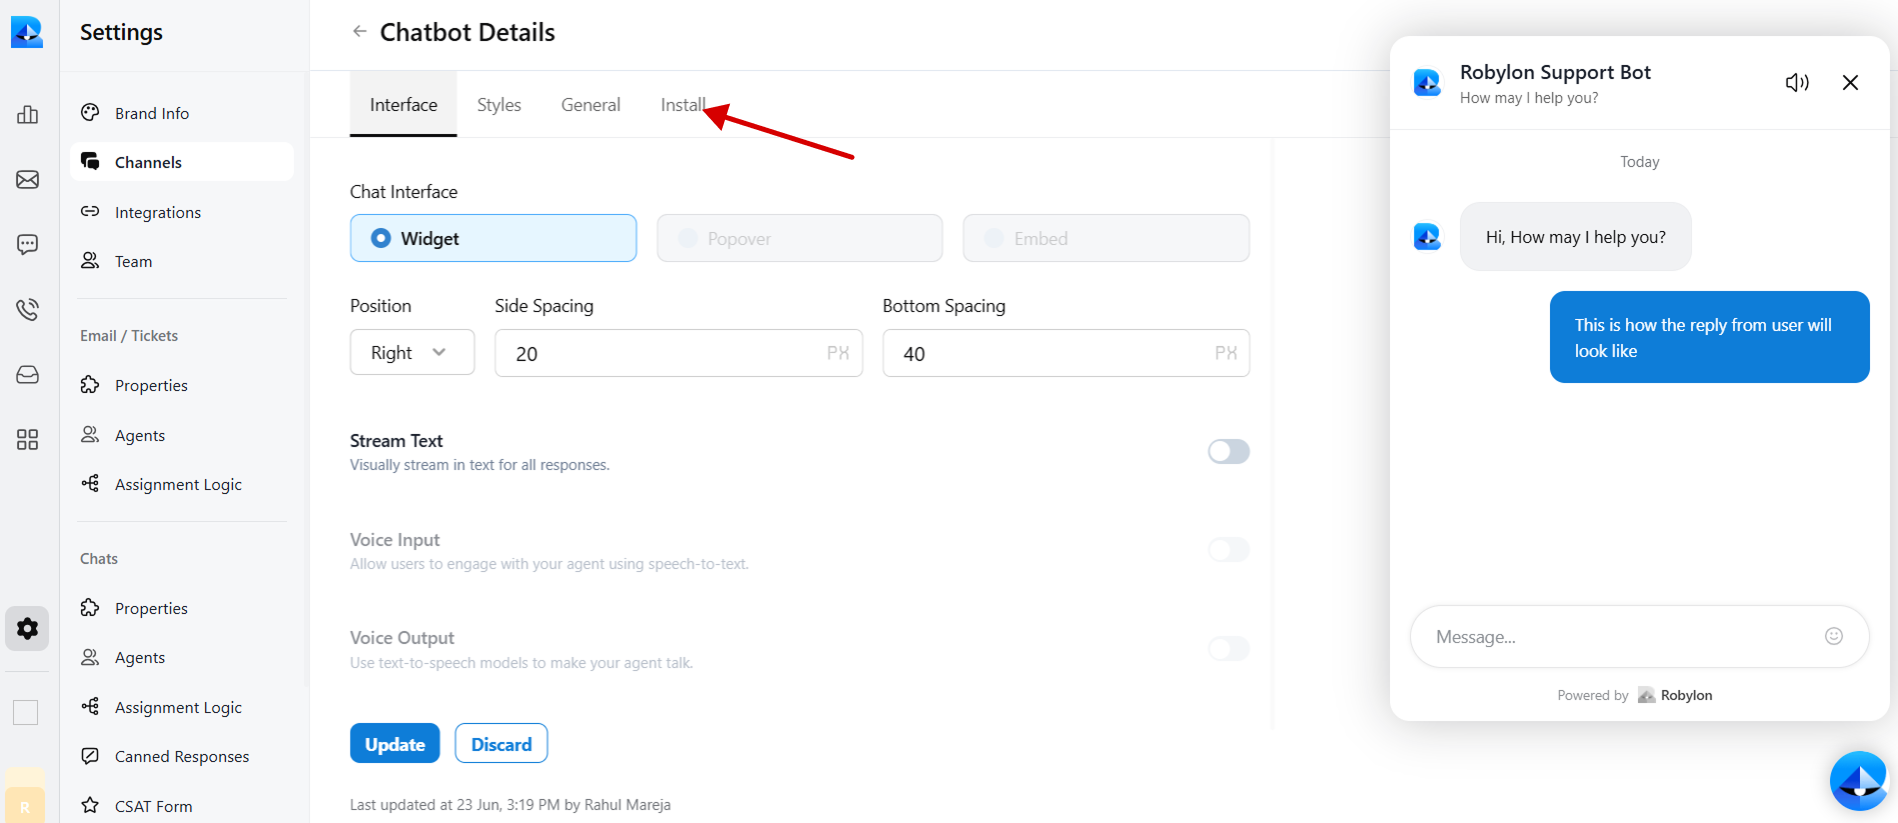 6. Select React to embed code in Wix.
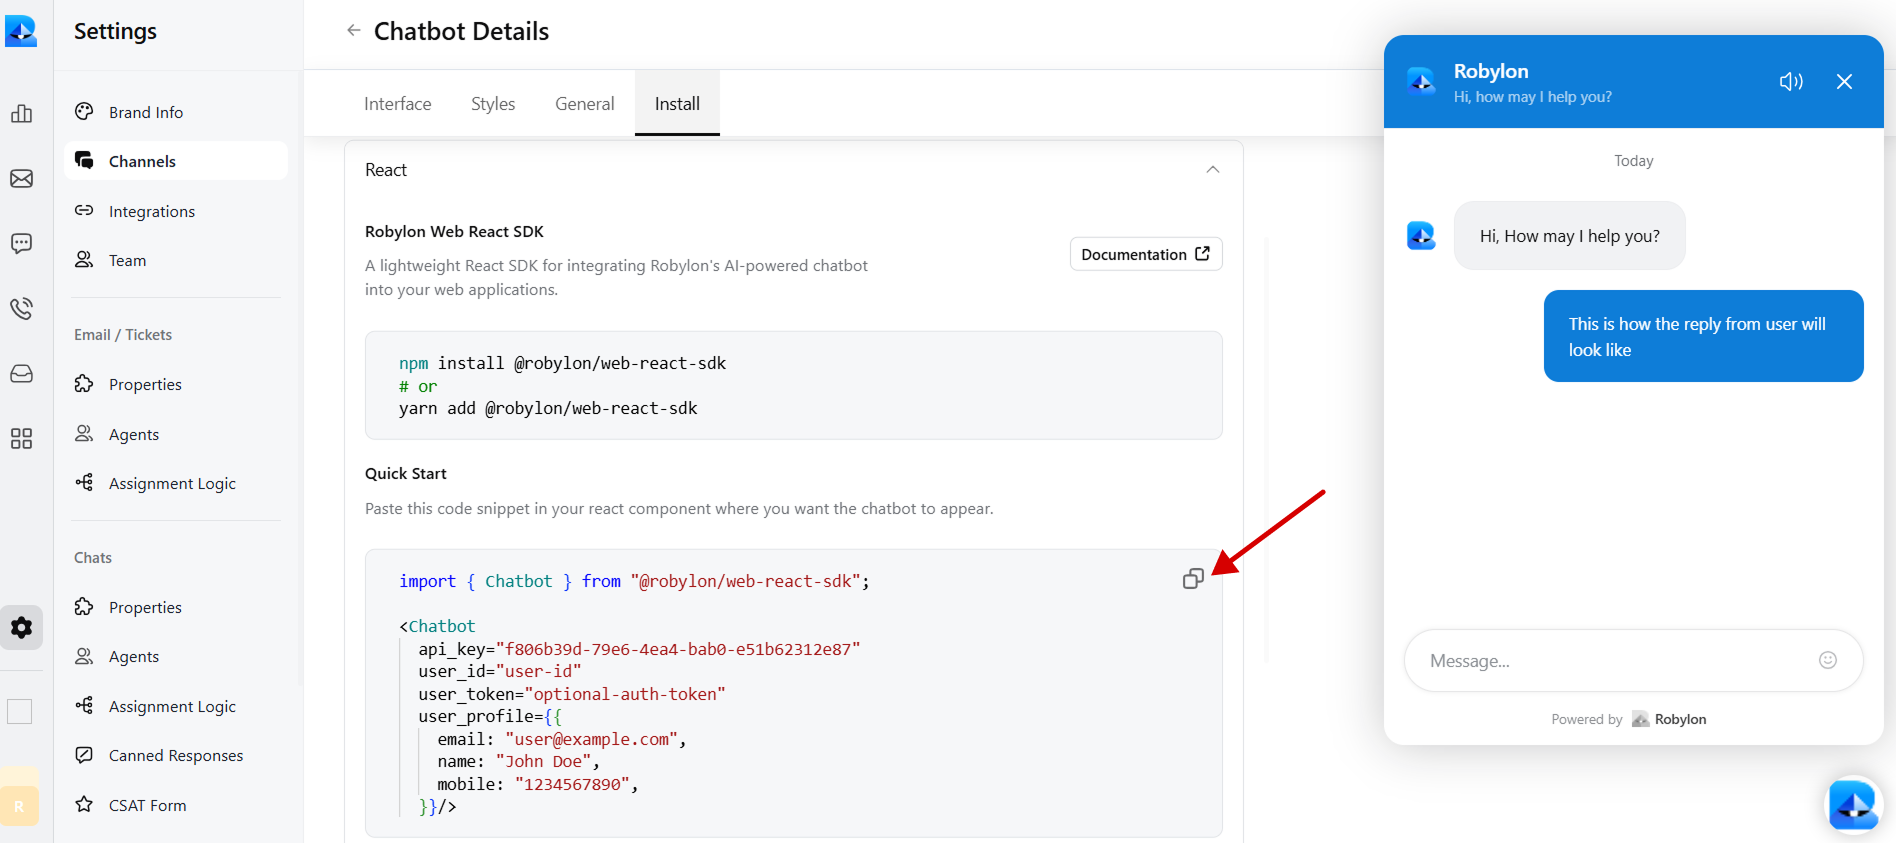
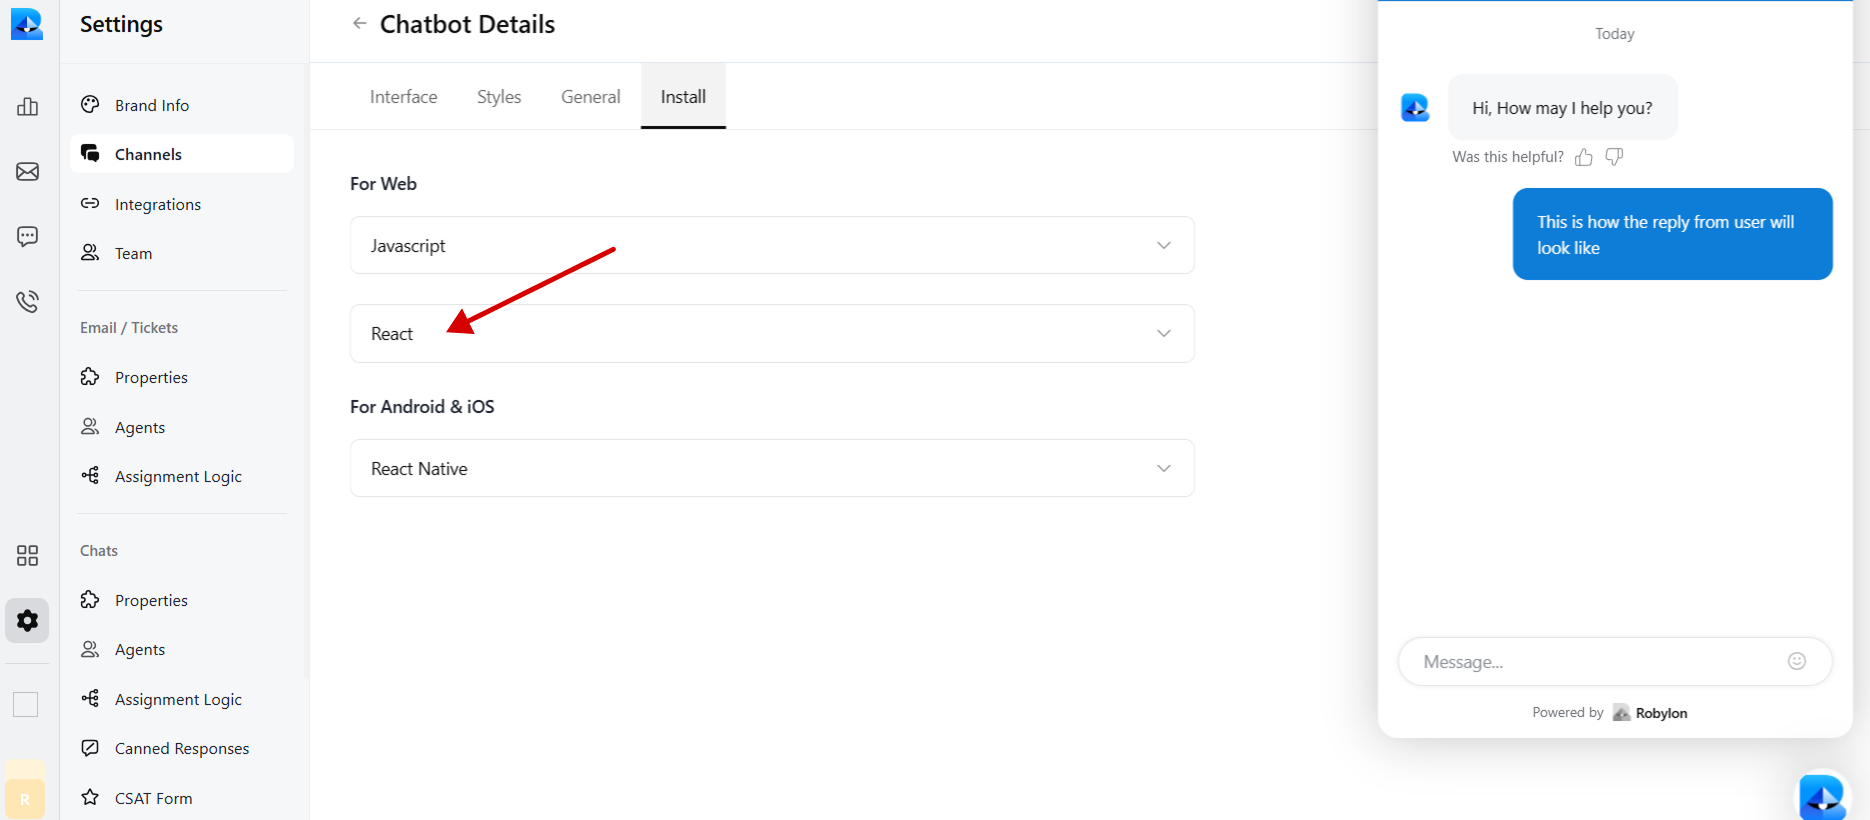 7. Copy the provided chatbot embed code.
 ### **Step 2**: Sign in to Your Wix Account and Embed Your Chatbot
1. Login to your Wix account and go to the dashboard.
2. On your dashboard, locate and click on the ‘Design Site’ button in the top right corner of the dashboard.
### **Step 2**: Sign in to Your Wix Account and Embed Your Chatbot
1. Login to your Wix account and go to the dashboard.
2. On your dashboard, locate and click on the ‘Design Site’ button in the top right corner of the dashboard.
 3. Select the site you want to add the Robylon chatbot to. Click and load that site into your Wix editor.
4. Scroll down to any section of the page you want to add the Robylon chatbot.
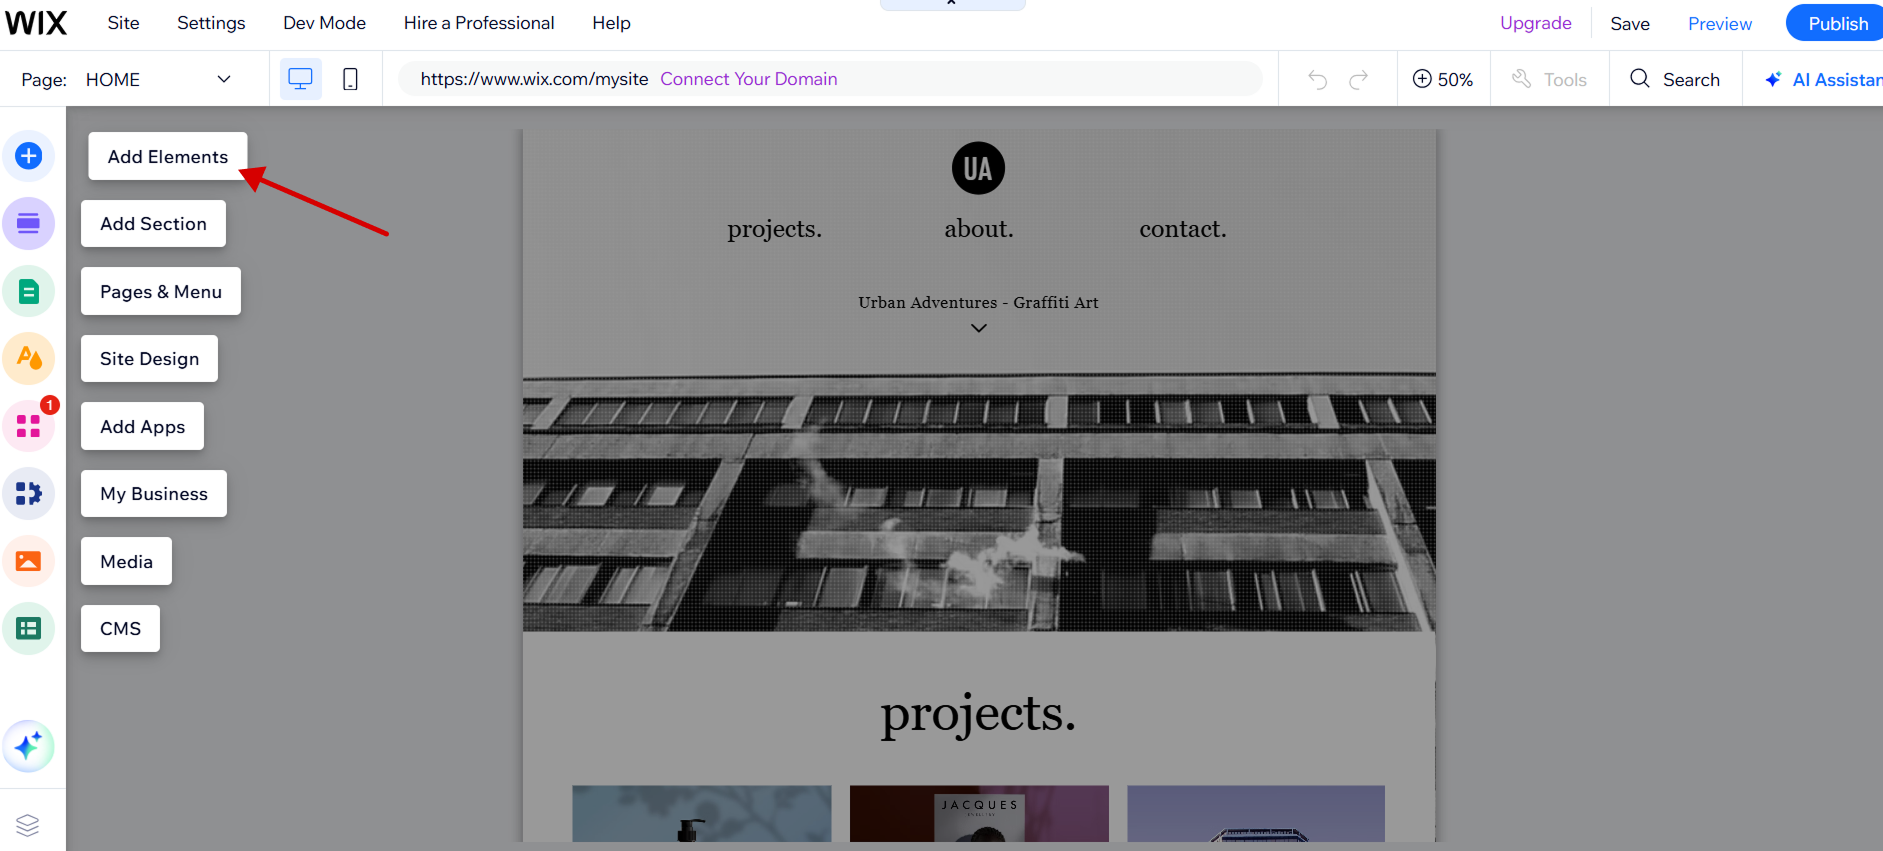
5. Click on the Big Plus icon (Add Elements) on the left sidebar of your Wix editor.
3. Select the site you want to add the Robylon chatbot to. Click and load that site into your Wix editor.
4. Scroll down to any section of the page you want to add the Robylon chatbot.
5. Click on the Big Plus icon (Add Elements) on the left sidebar of your Wix editor.
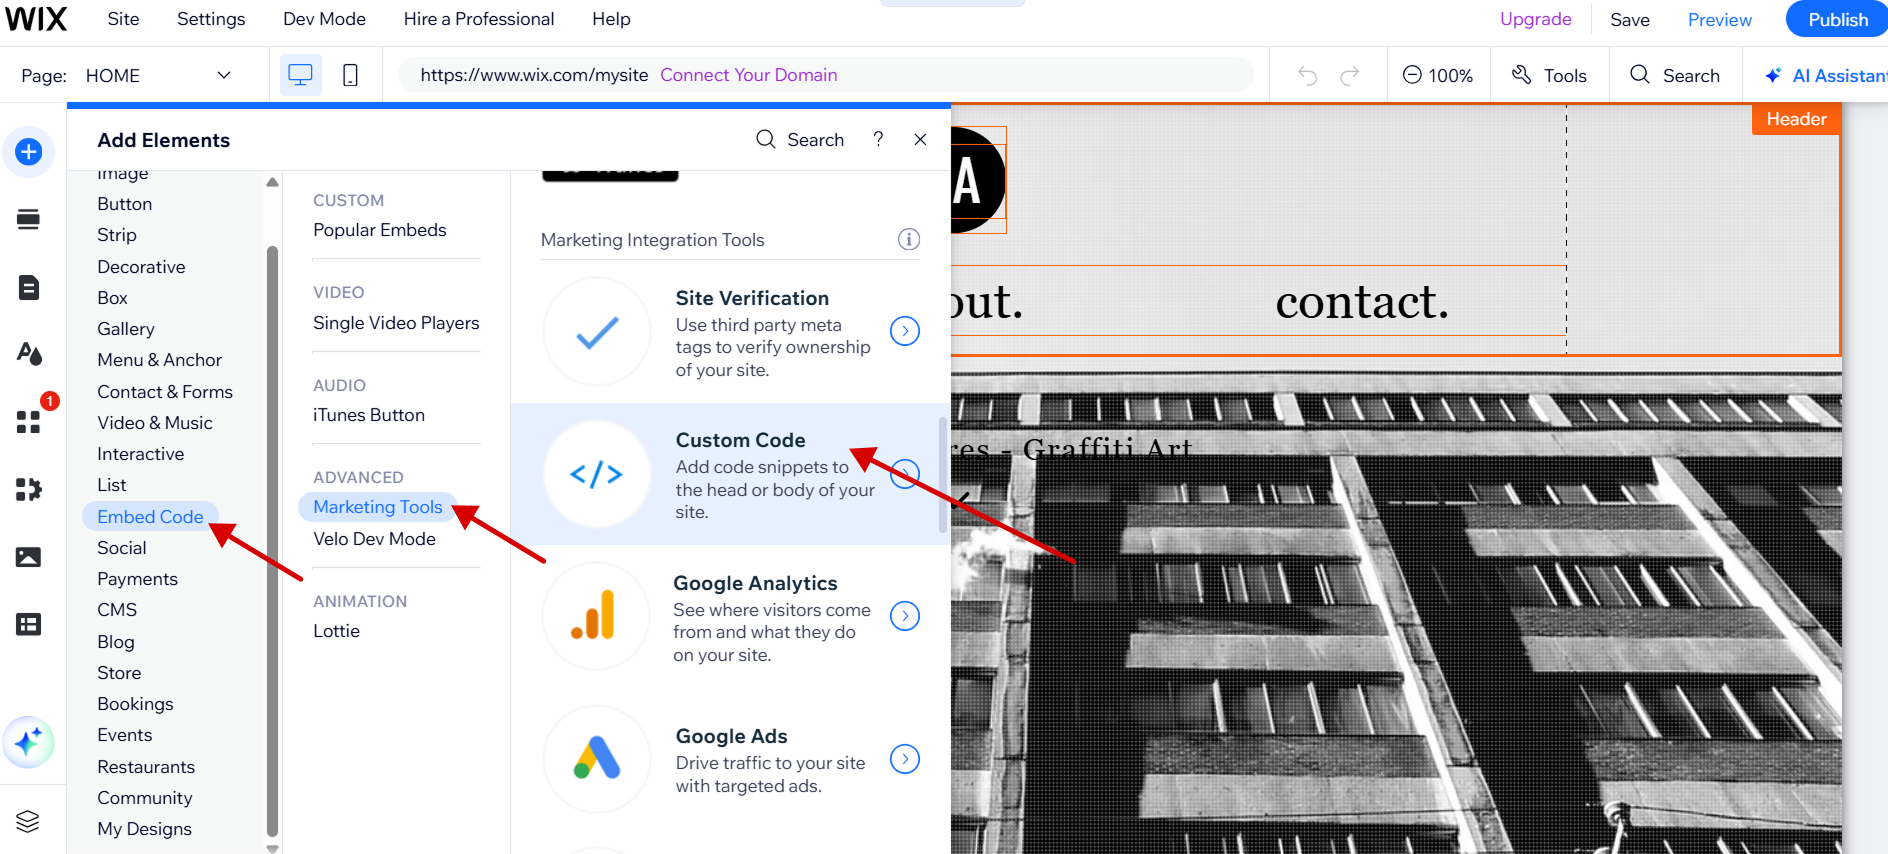
 6. Scroll down to locate and click on the ‘Embed Code’ button, then click on the ‘Marketing Tools’ button and select ‘Custom Code’ in that section.
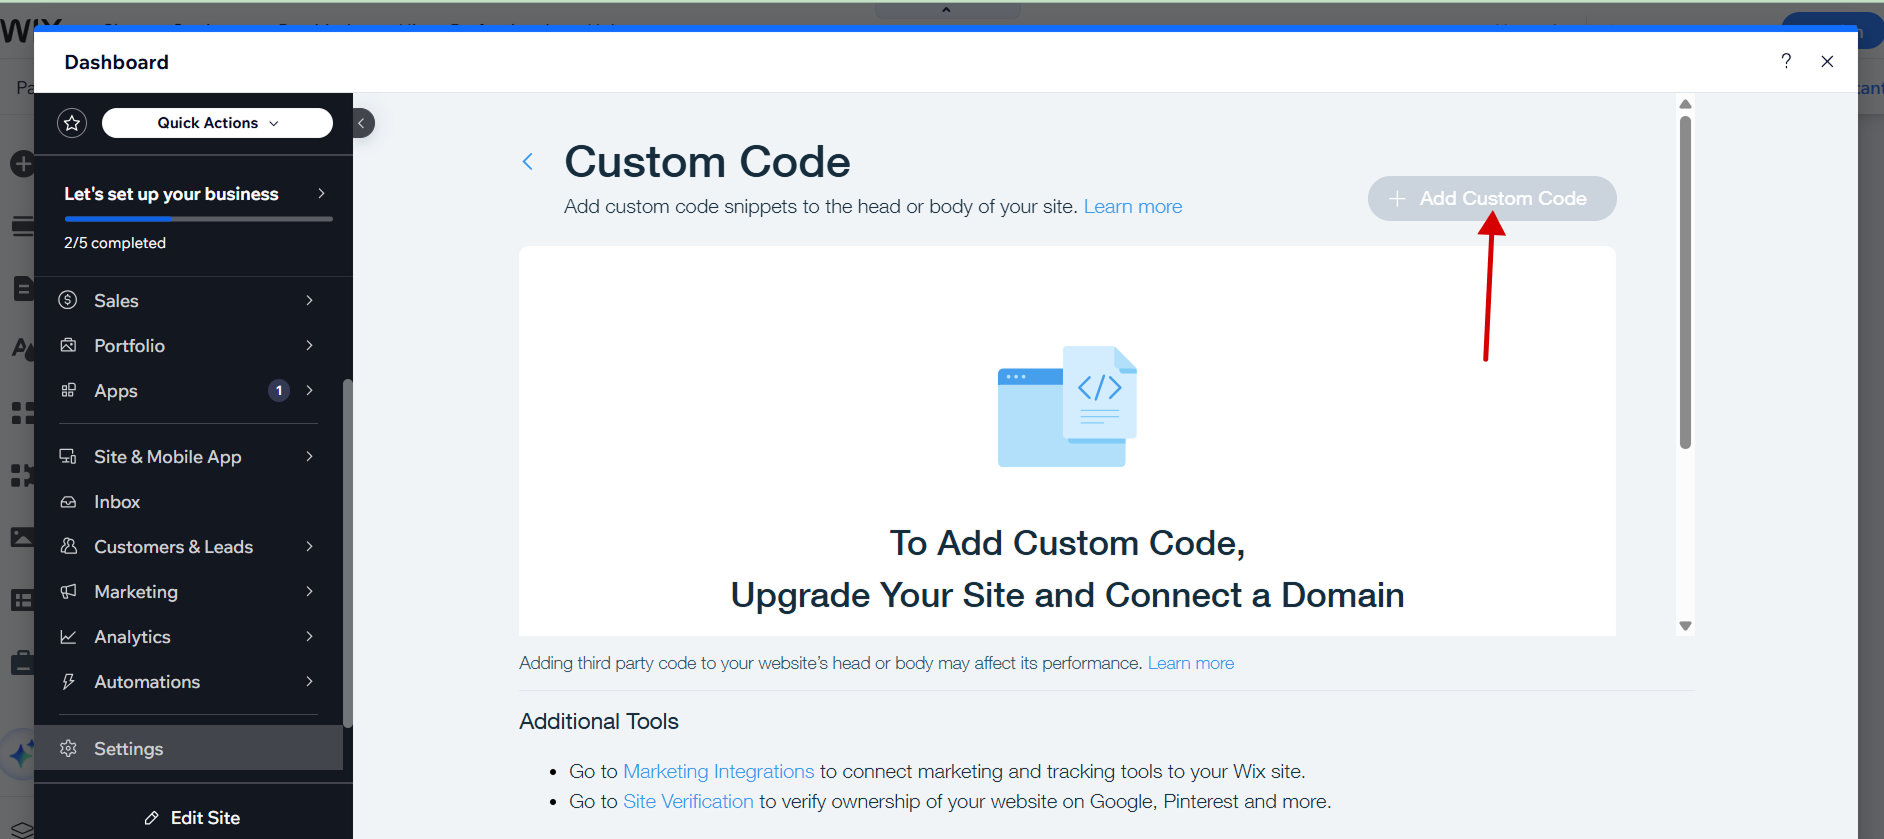
 7. The custom code widget should pop up, click ‘+ Add Custom Code’ in the top right corner of that widget.
 8. Paste the copied code snippet into the custom code editor and provide a name for your code.
9. Choose an option under ‘Add Code to Pages’.
10. Click where you want to place your chatbot under the ‘Place Code’ section.
11. Click Apply and preview your website, and there you should see the floating Robylon chat icon on your website.
8. Paste the copied code snippet into the custom code editor and provide a name for your code.
9. Choose an option under ‘Add Code to Pages’.
10. Click where you want to place your chatbot under the ‘Place Code’ section.
11. Click Apply and preview your website, and there you should see the floating Robylon chat icon on your website.