> ## Documentation Index
> Fetch the complete documentation index at: https://guides.robylon.ai/llms.txt
> Use this file to discover all available pages before exploring further.
# Robylon × Wordpress Integration: Add Chat to your site
> Install the Robylon chat widget on Wordpress. Add chat widgets, secure webhooks, and event tracking-without code.
### **Step 1: Generate and Copy Your Robylon Chatbot Embed Code.**
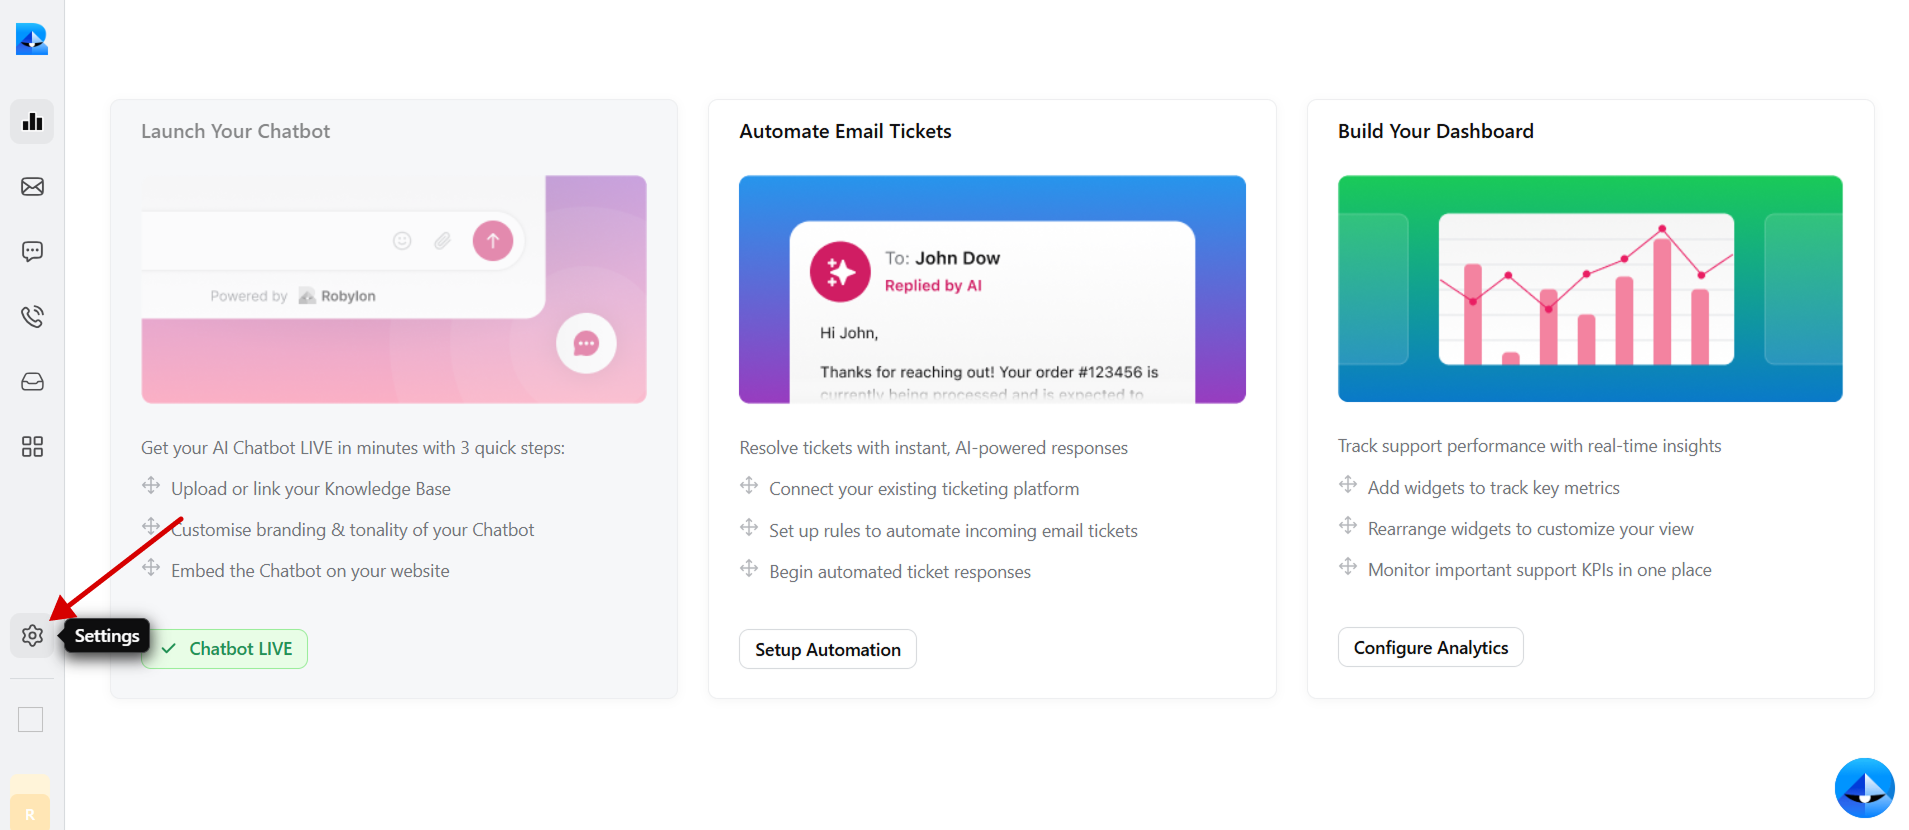
1. Log in to your Robylon account and open the dashboard.
2. In the left panel, click on the settings button to navigate to the settings page.
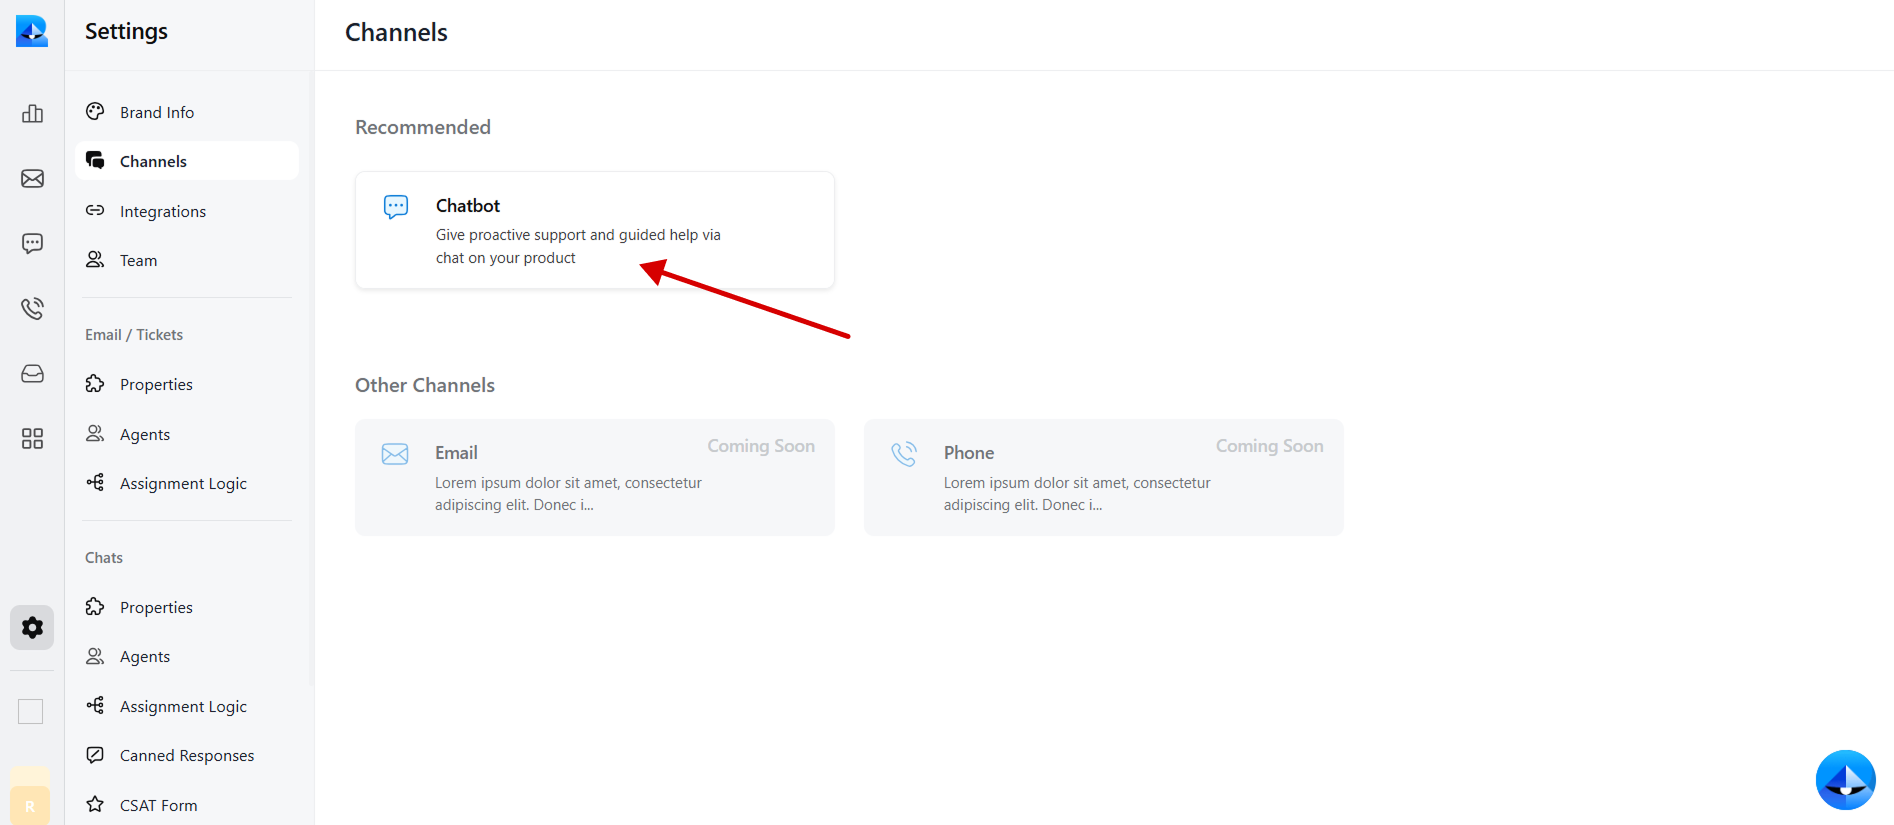
 3. Within the settings tab, select [Channels](https://app.robylon.ai/settings/channels).
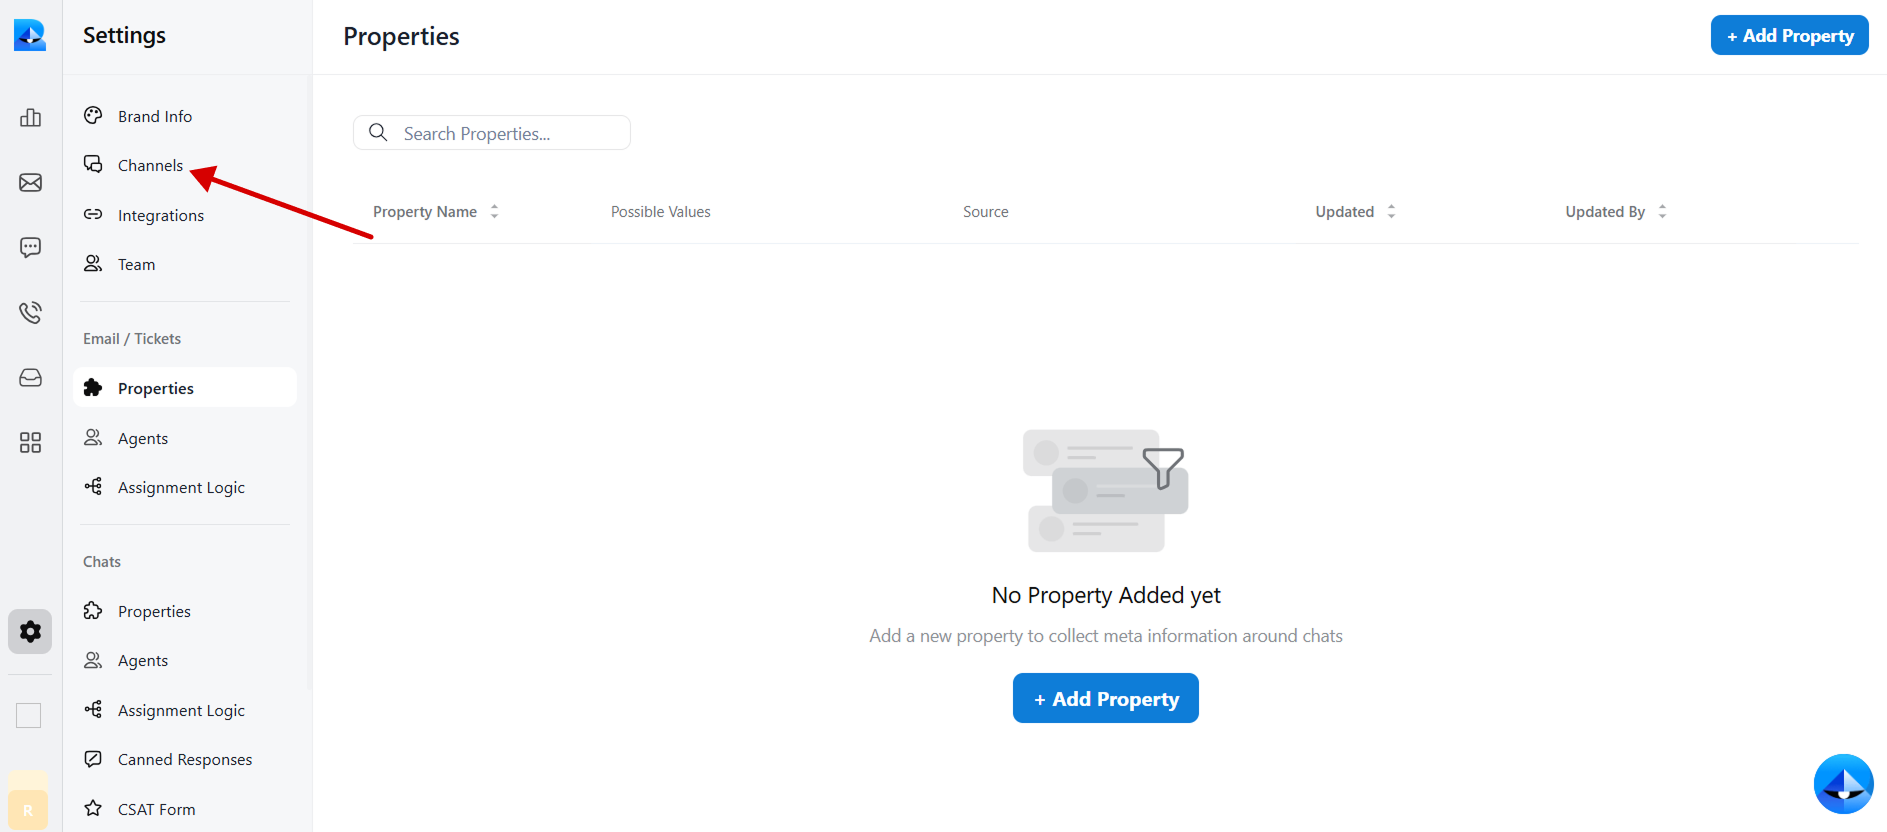 4. Click on the [Chatbot](https://app.robylon.ai/settings/channels/chatbot/interface) widget to access the chatbot details.
 5. Navigate to the [Install](https://app.robylon.ai/settings/channels/chatbot/install) tab within the chatbot details page.
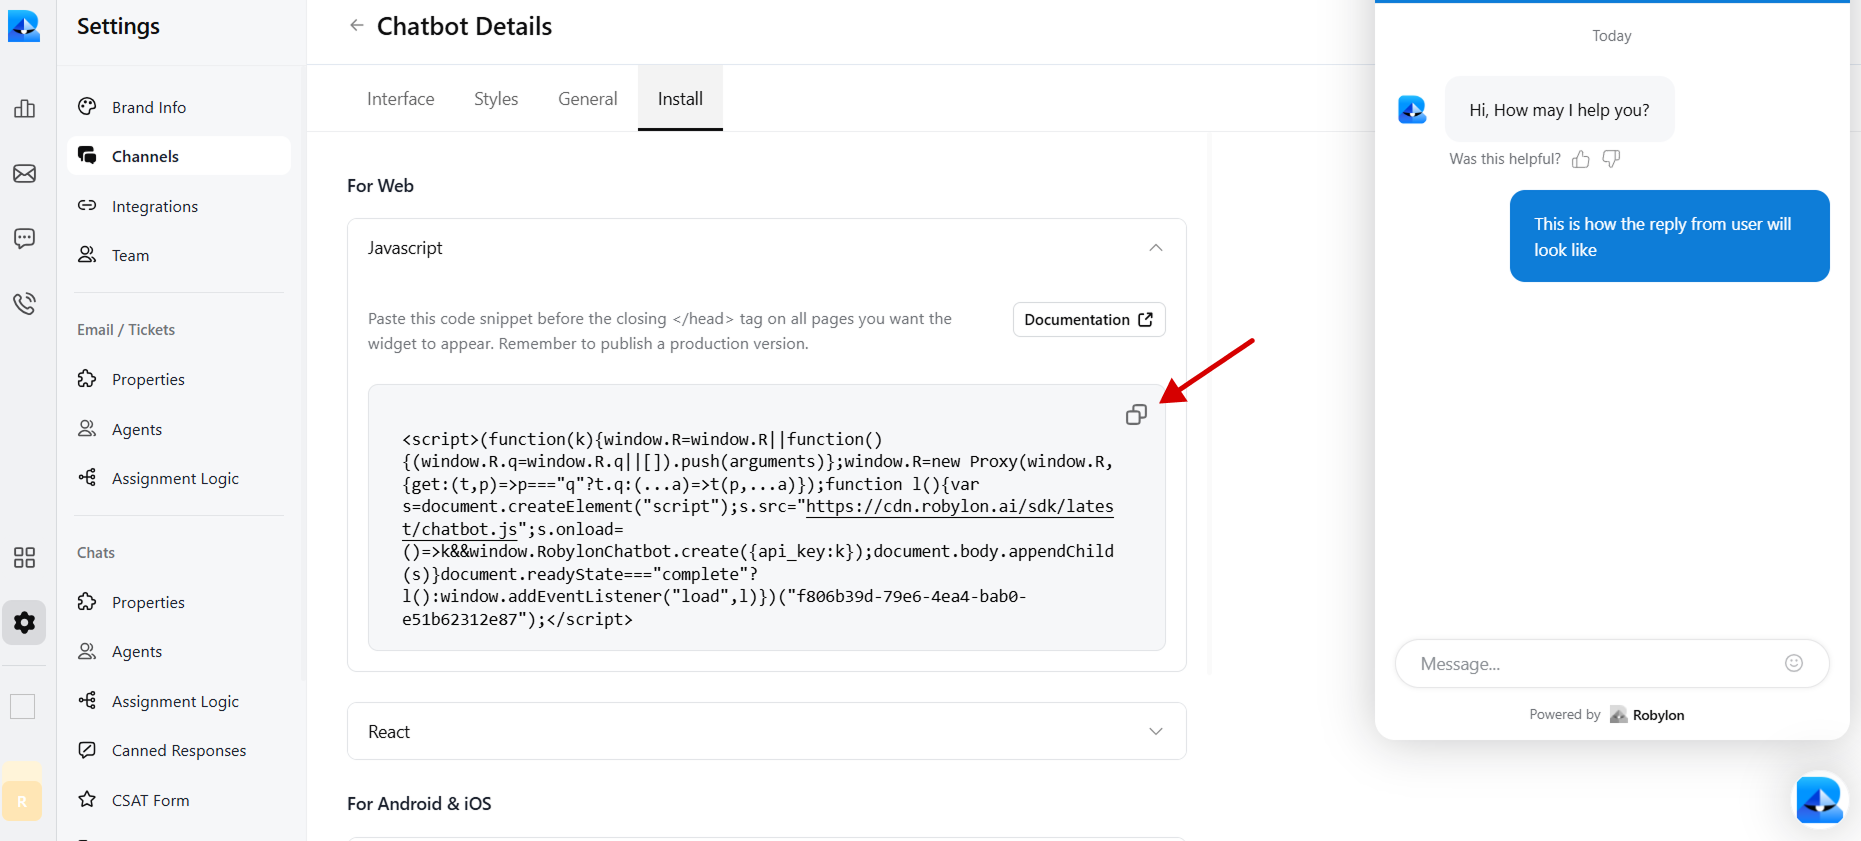
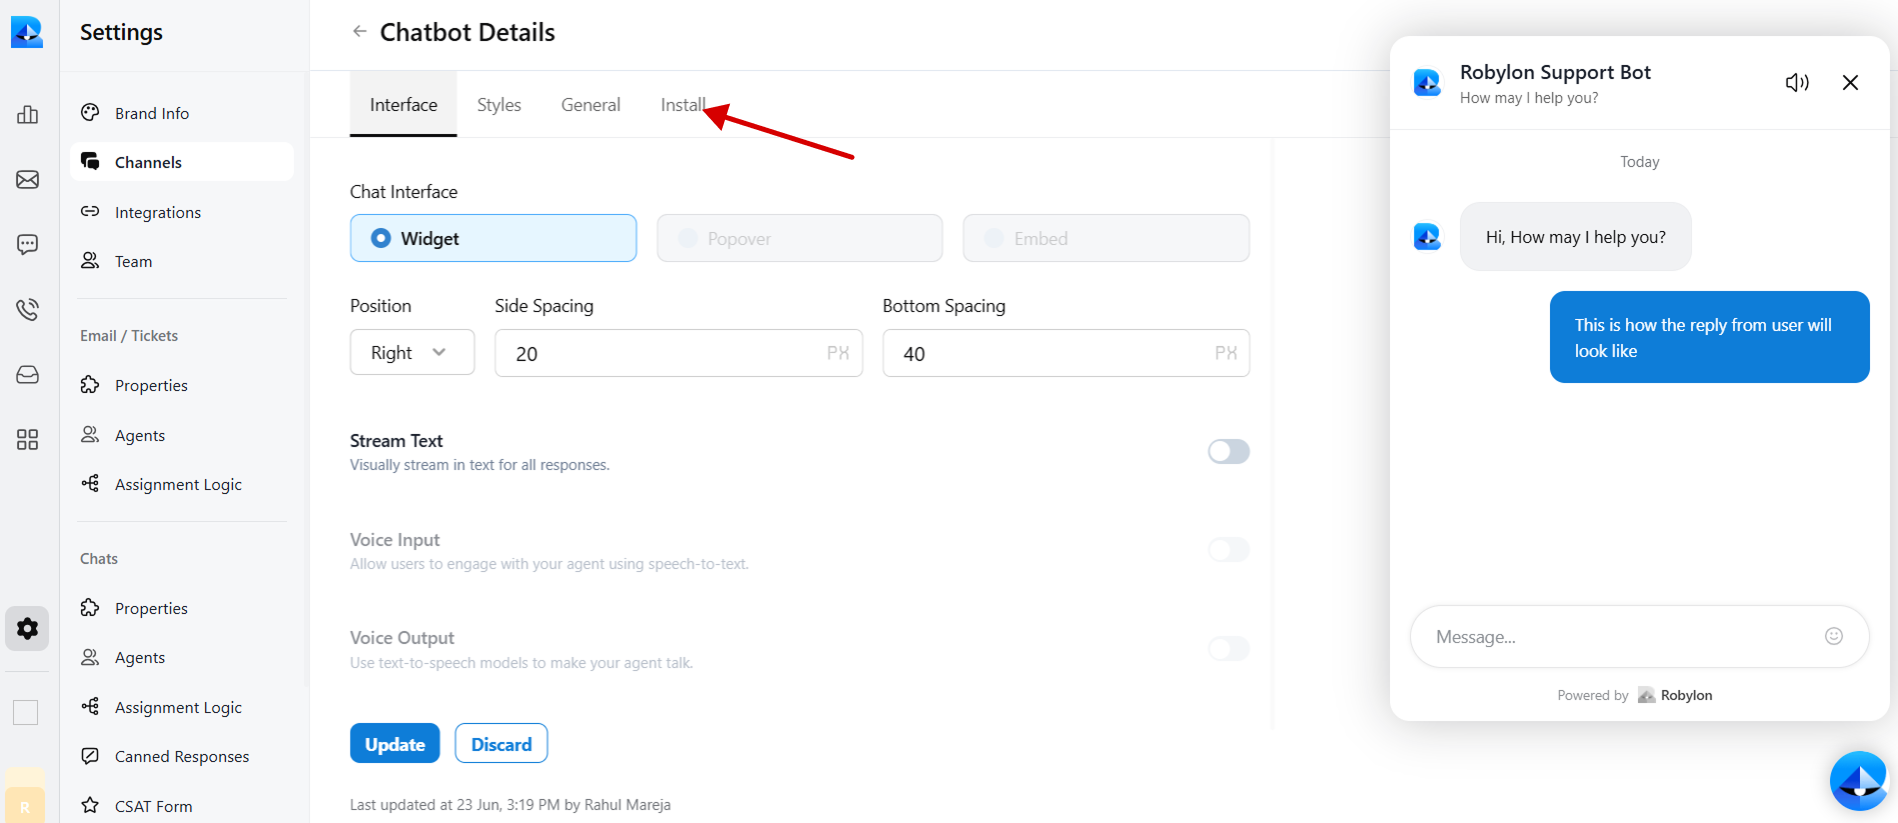 6. Select JavaScript to embed code in WordPress.
 7. Copy the provided chatbot embed code.
 ### **Step 2**: Install the WPCode plugin on your WordPress Website to embed Robylon’s bot code
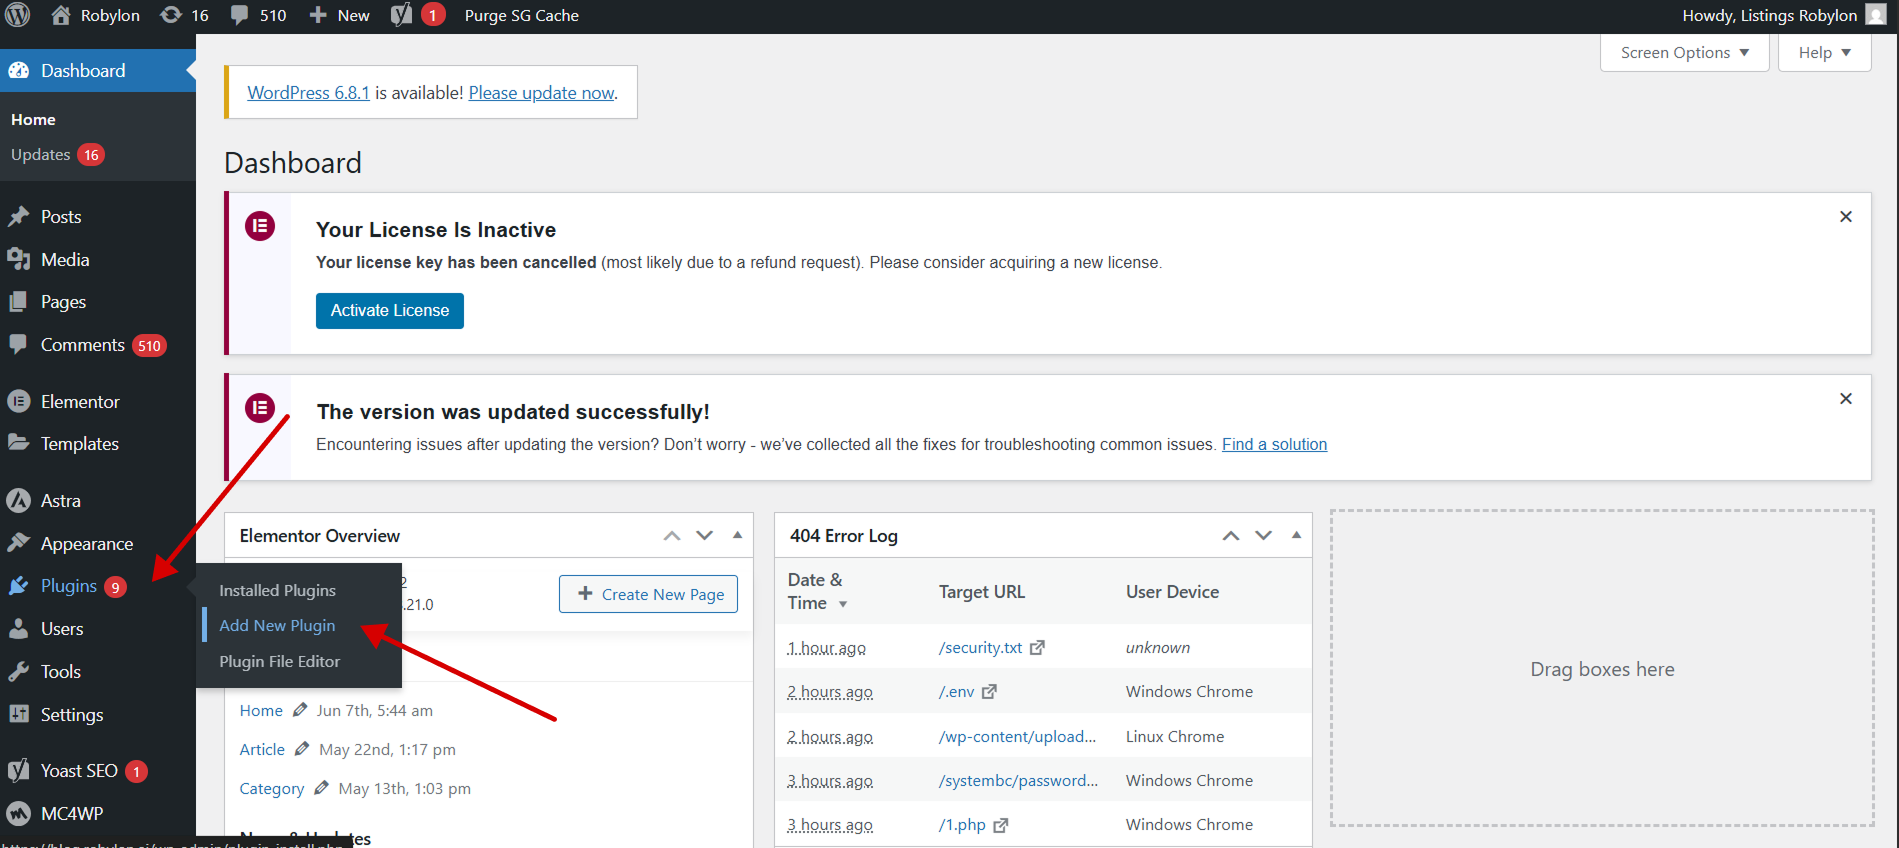
1. Login to your WordPress dashboard, and go to the plugin button in the admin bar on the left side, and then click on the ‘Add New Plugin’.
### **Step 2**: Install the WPCode plugin on your WordPress Website to embed Robylon’s bot code
1. Login to your WordPress dashboard, and go to the plugin button in the admin bar on the left side, and then click on the ‘Add New Plugin’.
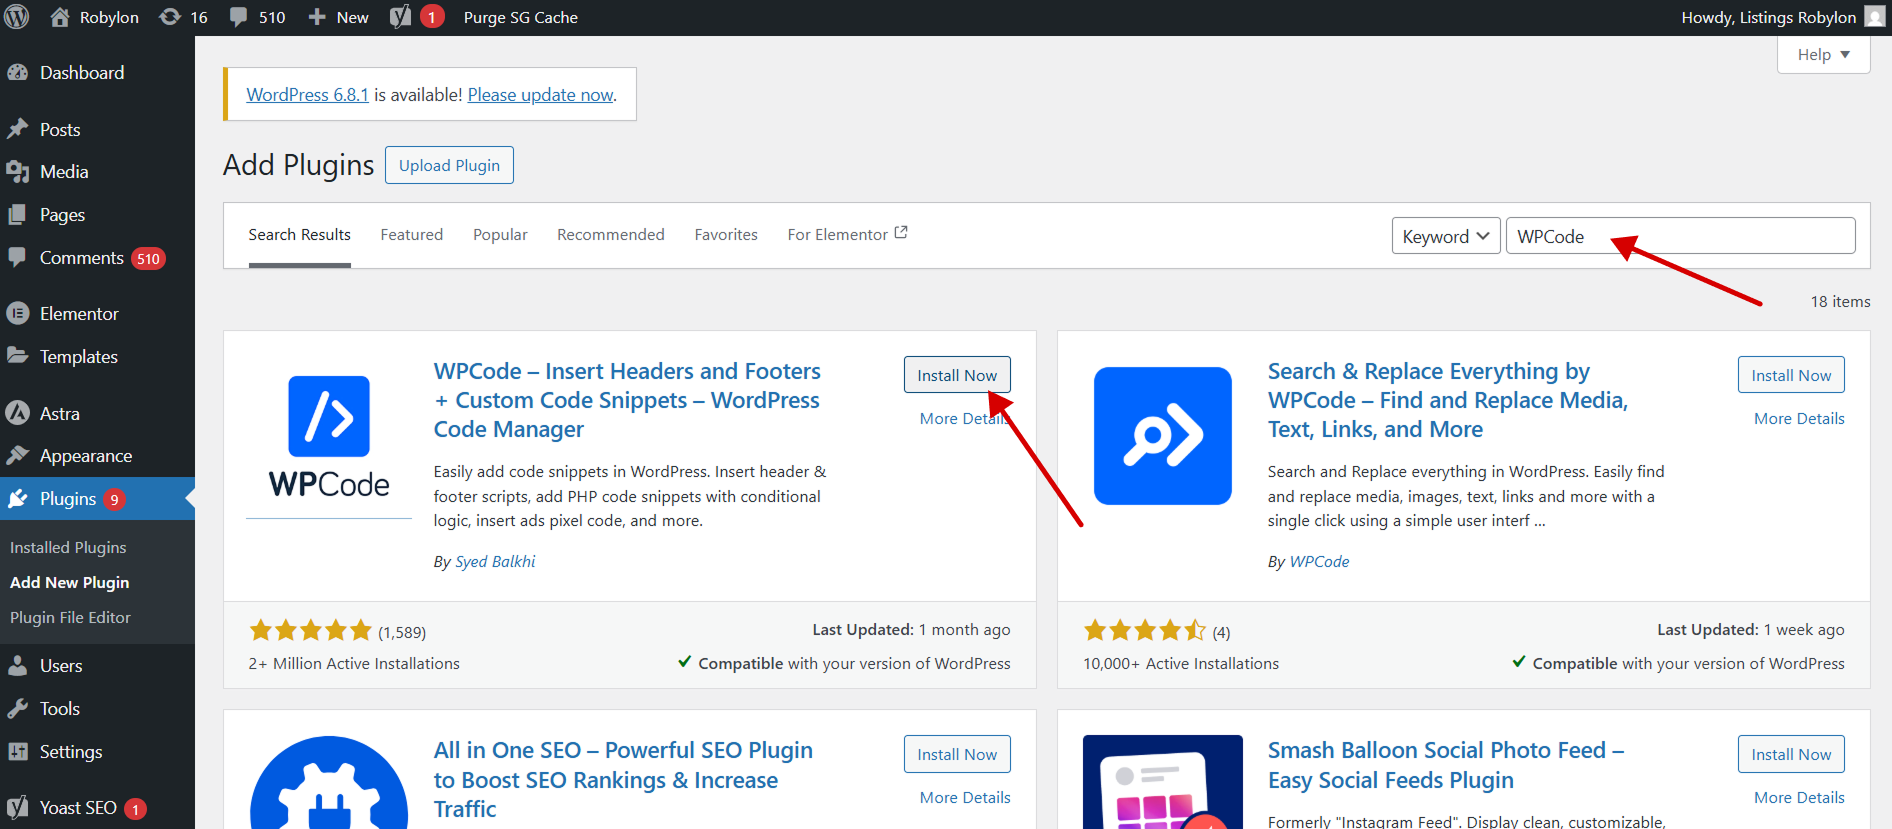
 2. Then search for the ‘WPCode’ plugin and install it to embed custom code.
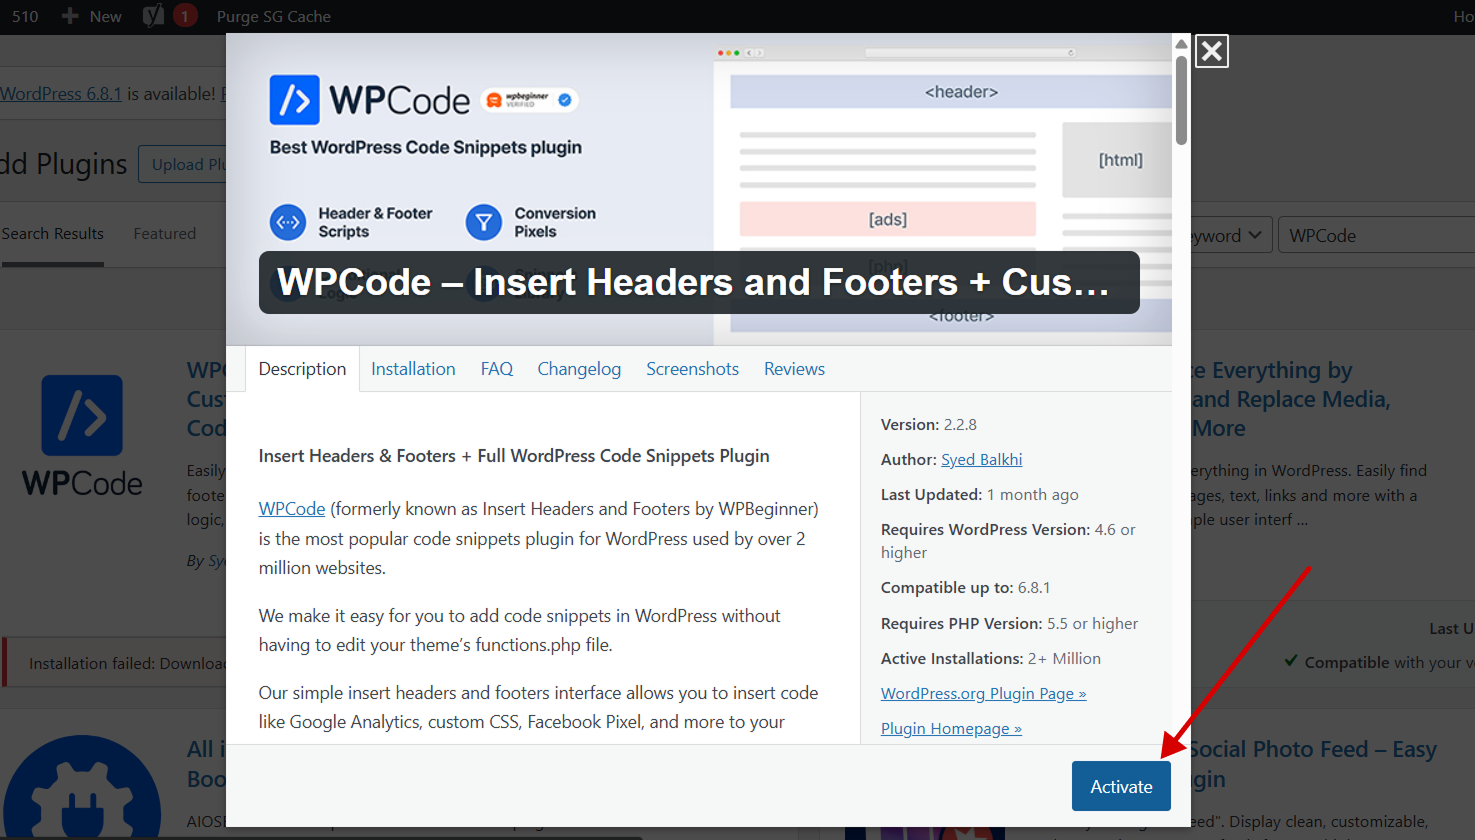
 3. Click on the ‘Activate’ button in the plugin. Upon activation, the plugin will be added to the ‘Installed Plugins’ page.
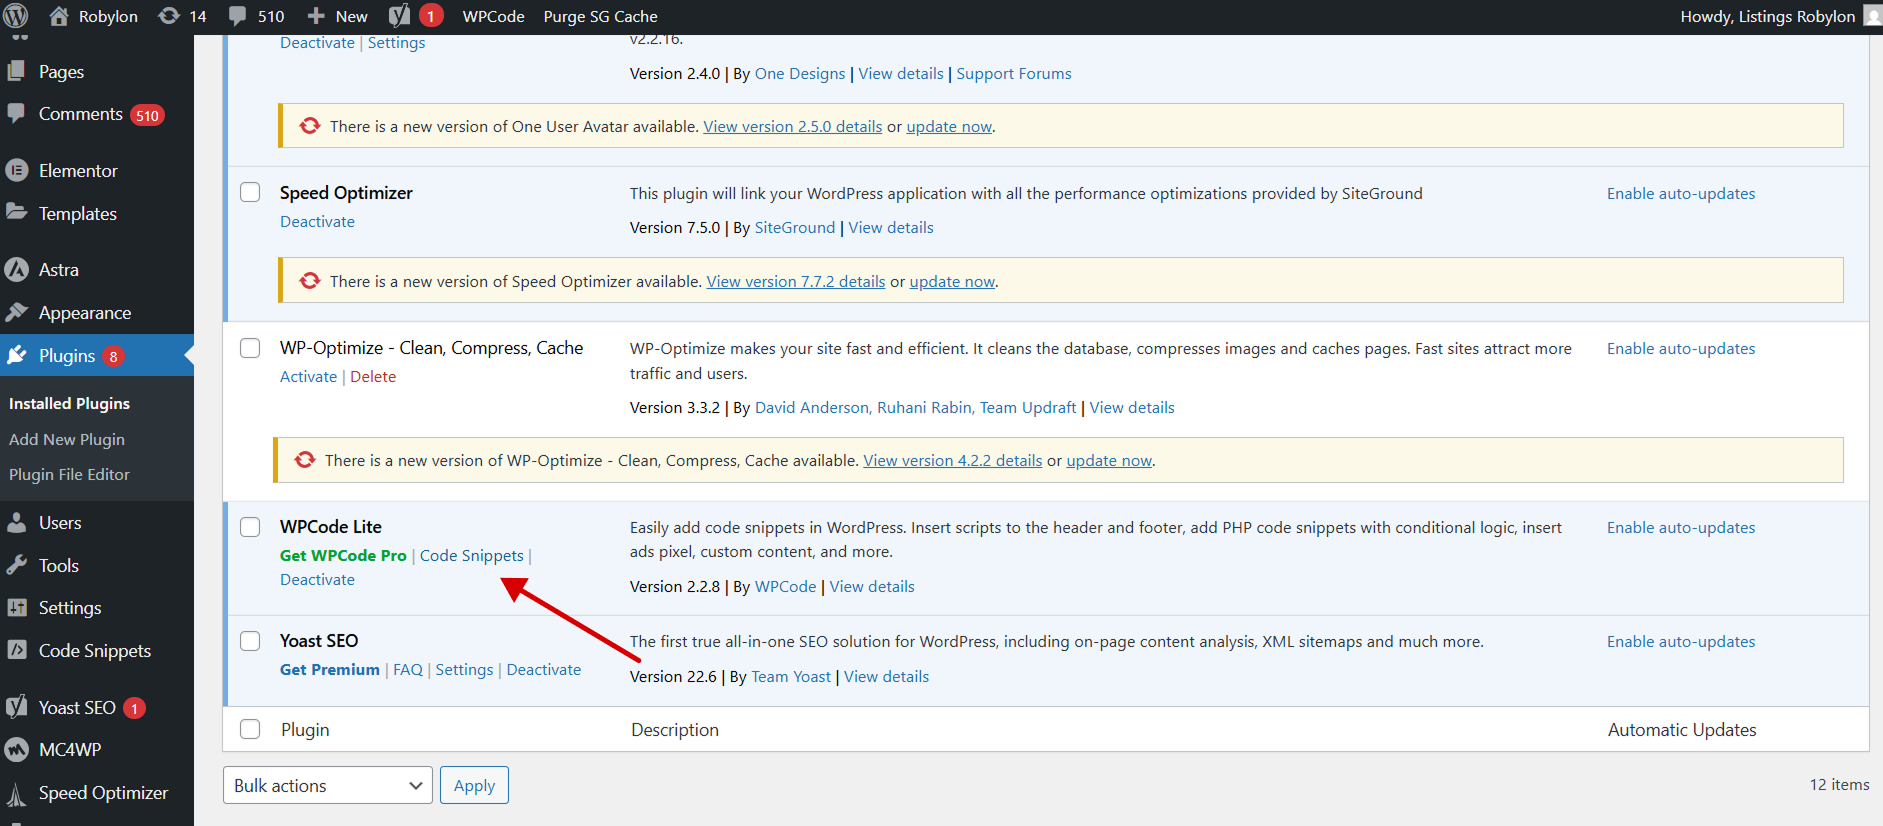
 4. Click on the ‘Installed Plugins’ button in the WordPress admin bar to go to the plugin page.
### **Step 3**: Embed the code in WordPress to Display Your Chatbot Widget
1. Click on the ‘Code Snippets’ labeled menu item in your WordPress admin bar, and it will open the ‘All Snippets’ page.
4. Click on the ‘Installed Plugins’ button in the WordPress admin bar to go to the plugin page.
### **Step 3**: Embed the code in WordPress to Display Your Chatbot Widget
1. Click on the ‘Code Snippets’ labeled menu item in your WordPress admin bar, and it will open the ‘All Snippets’ page.
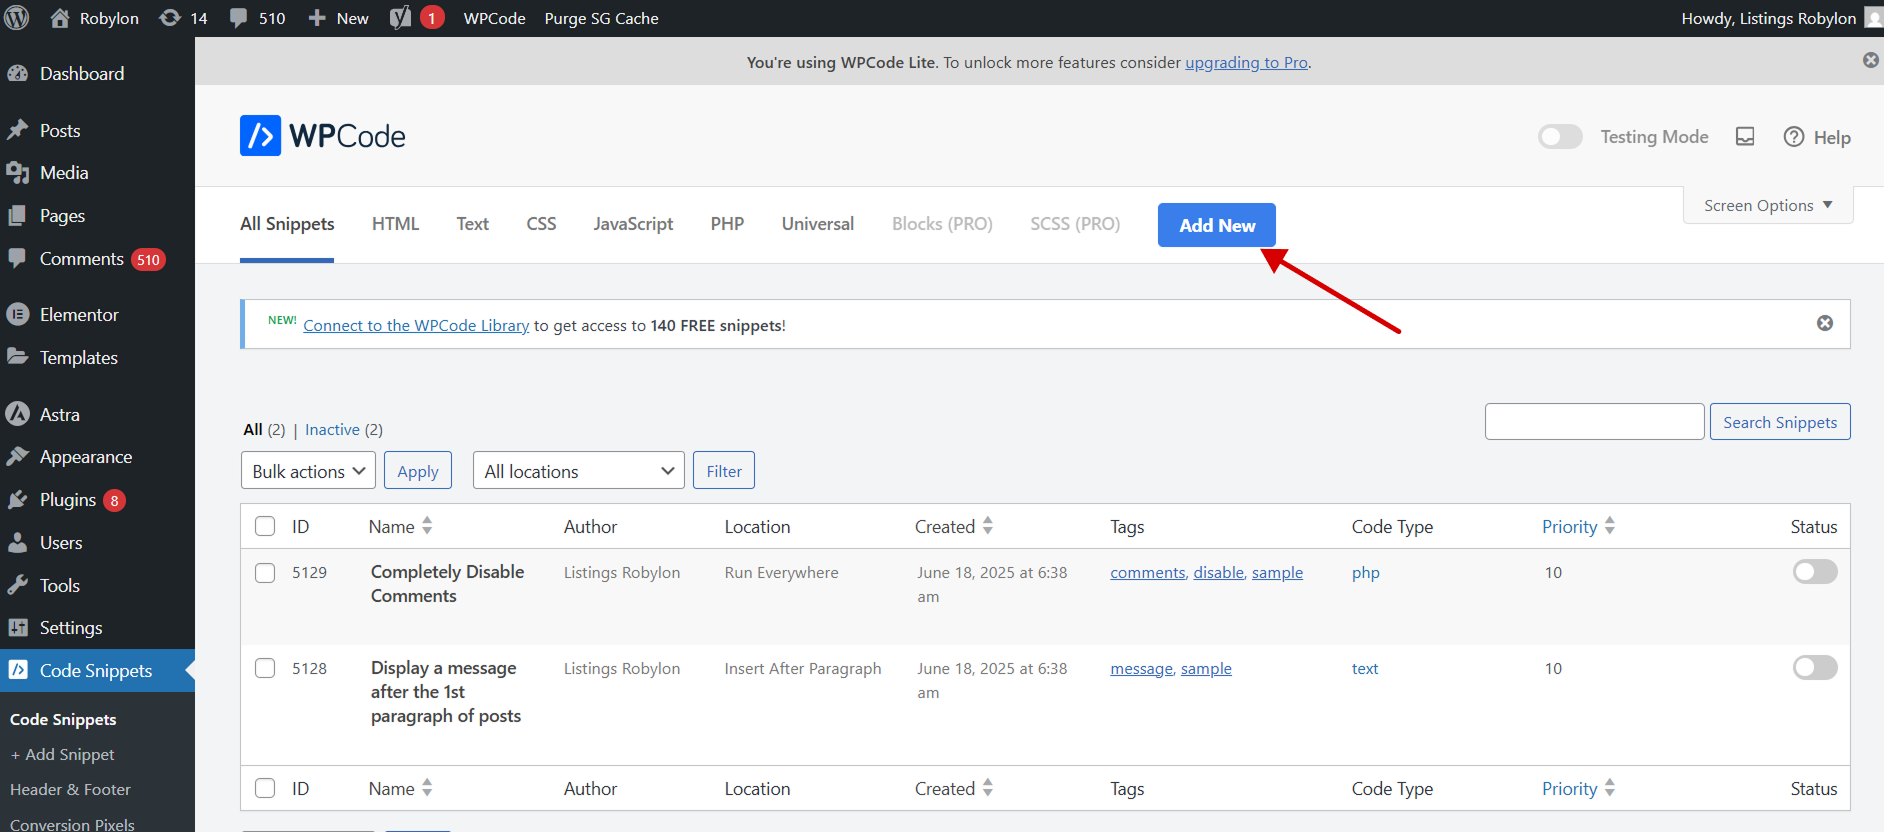
 2. Then, click on the ‘Add New’ button, and this will bring you to the add snippet page.
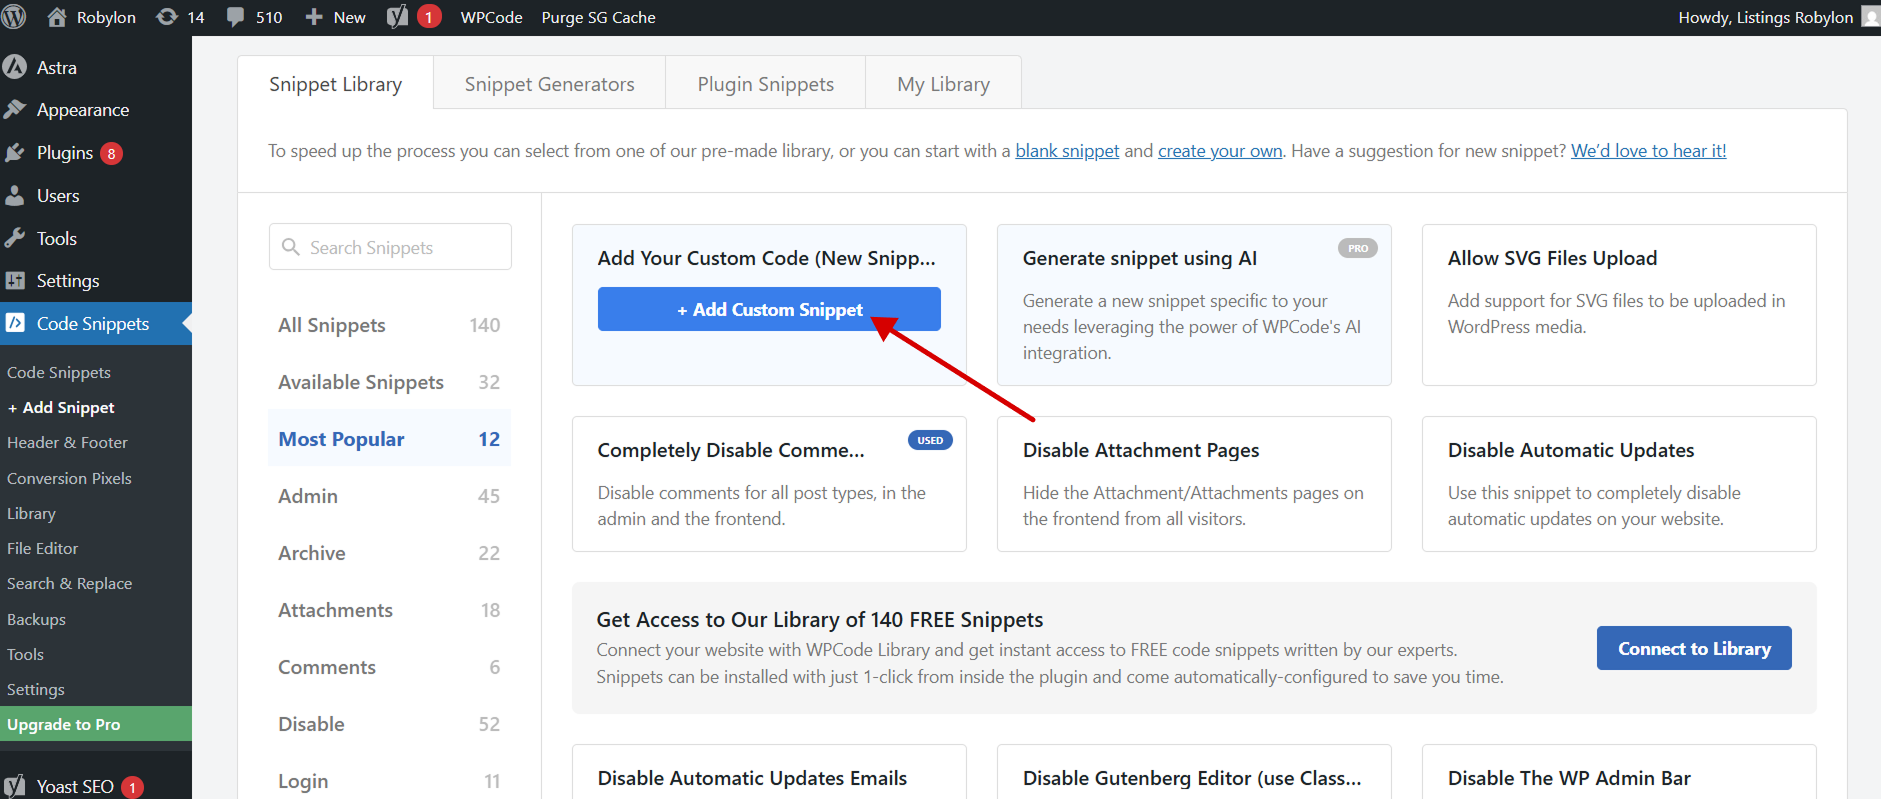
 3. Click on the ‘+Add Custom Snippet’ button.
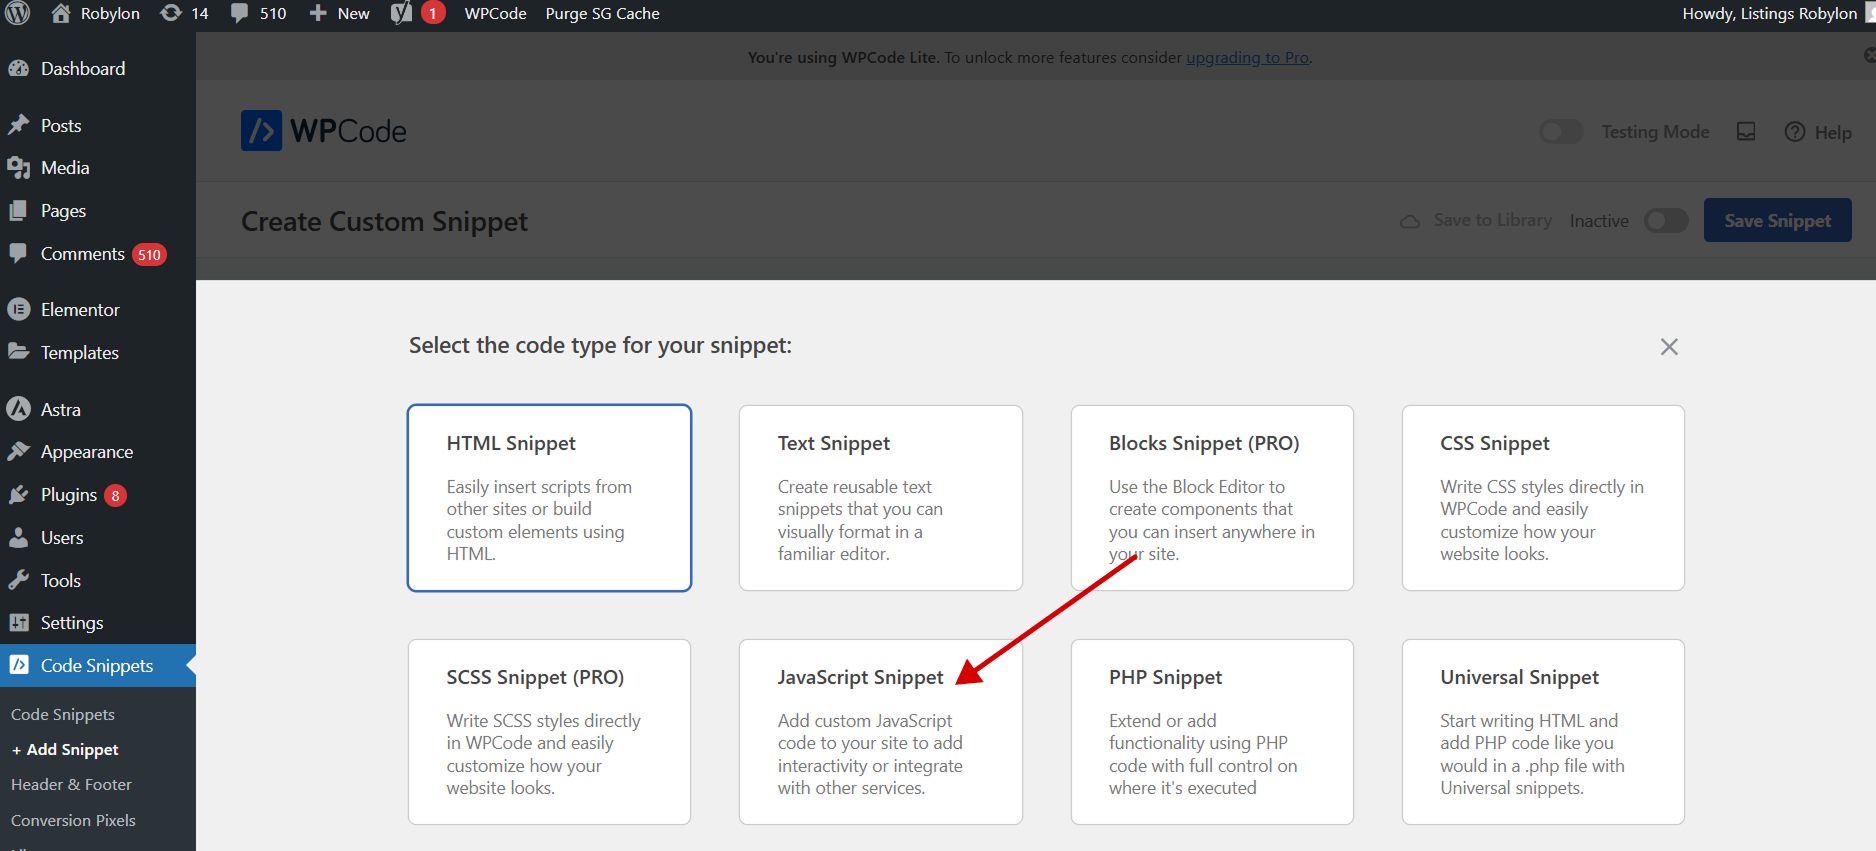
 4. Then, choose the code type from the list of options that appear on the screen, and click on JavaScript in our case.
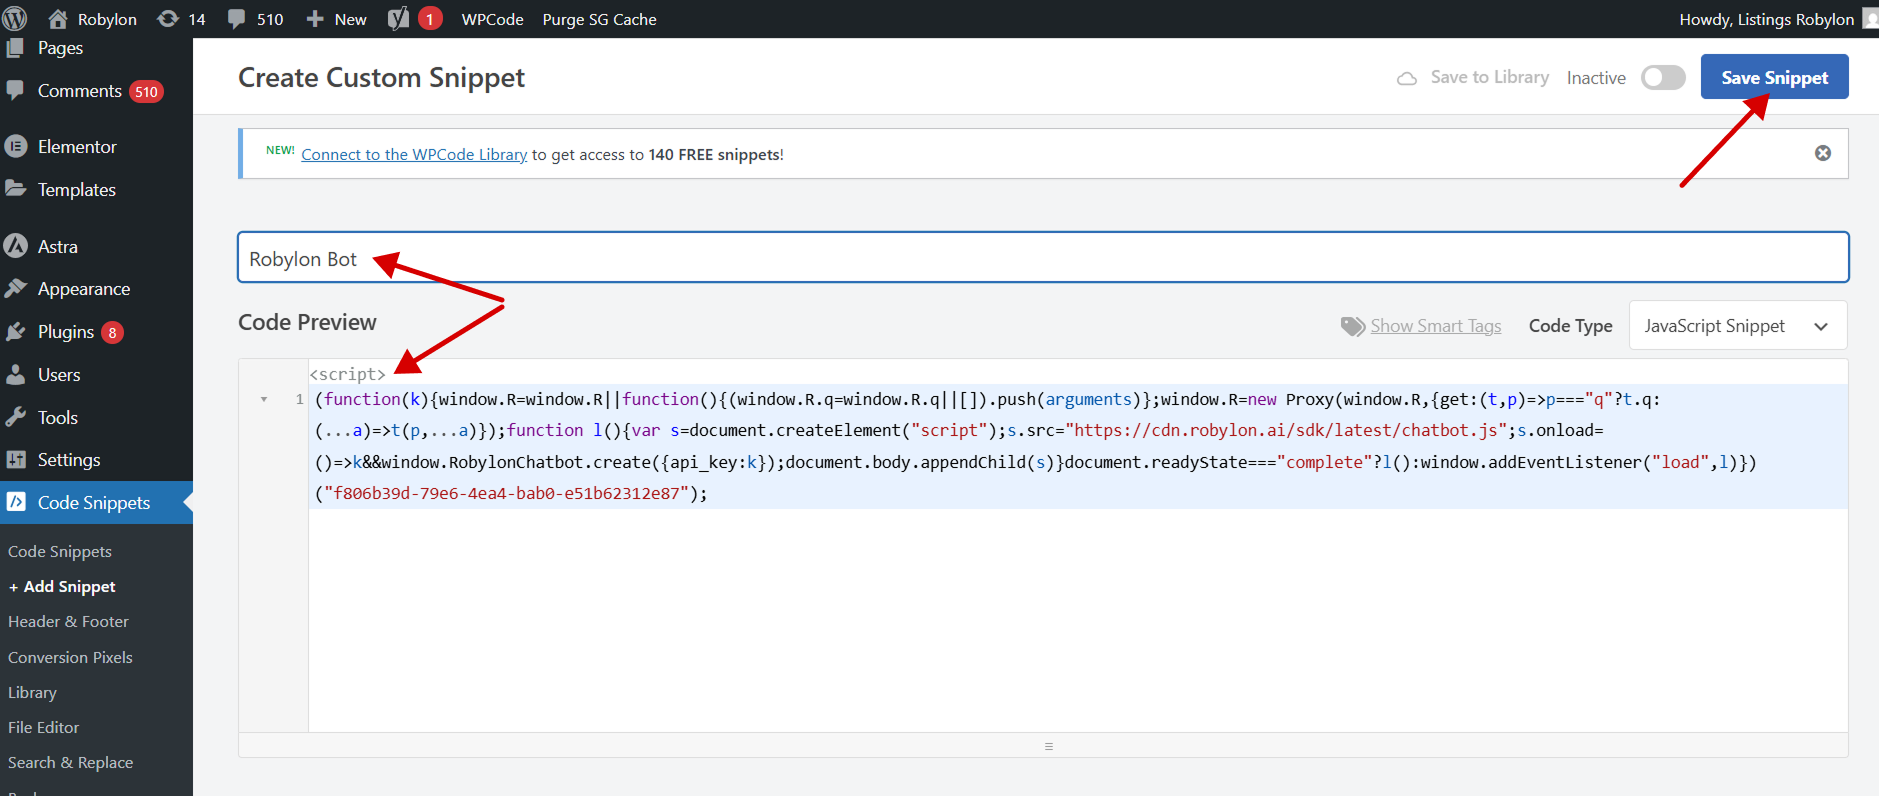
 5. Now, enter a title for the custom code snippet and paste the copied code for the chatbot, and save the snippet.
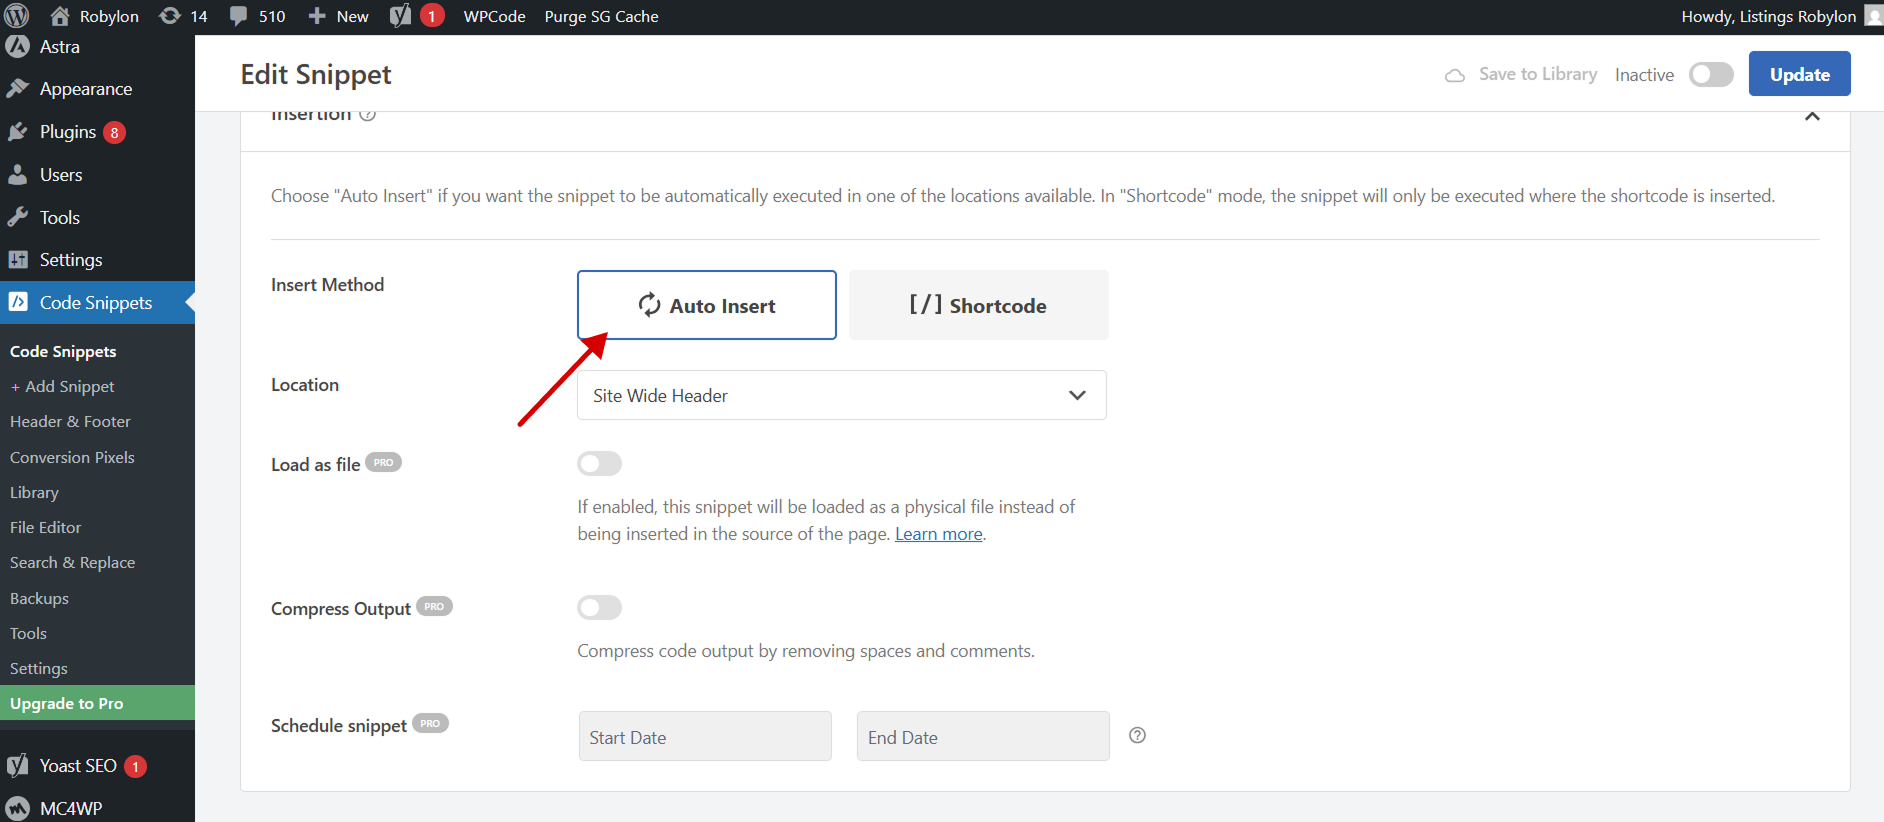
 6. Then you will see 2 options to insert, you can select the ‘Auto Insert’ method, and the snippet will be automatically inserted and executed on your site.
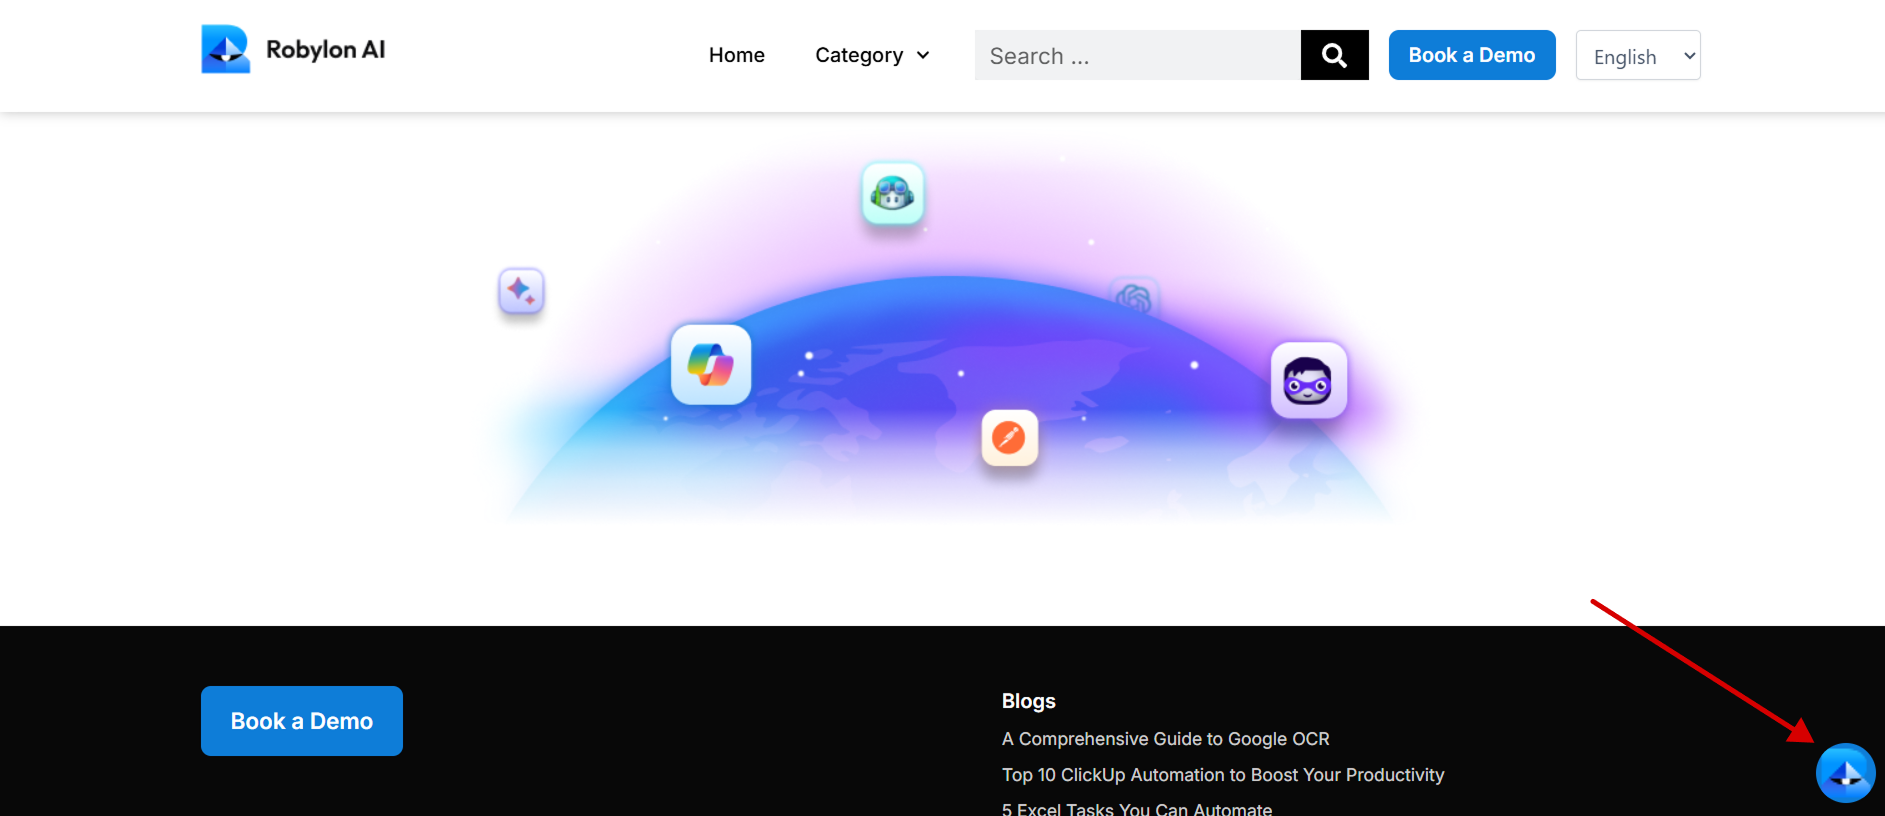
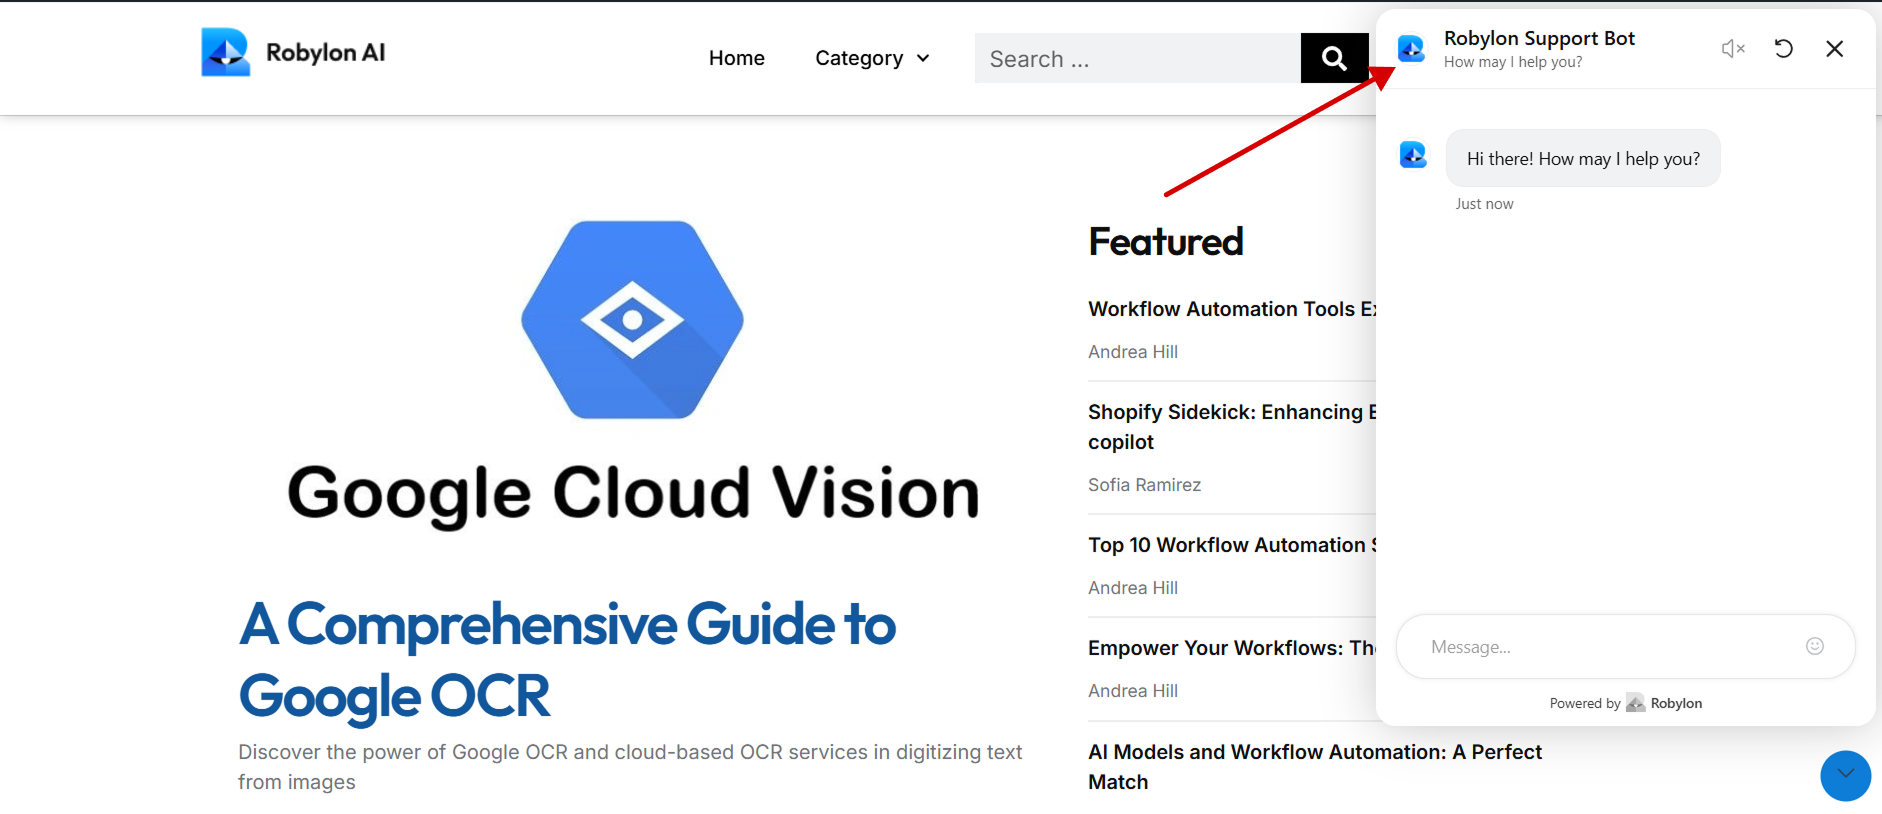
 7. Now you can preview your site to see the embedded Robylon’s chatbot there.