Step 1: Log in to your Robylon account and open the dashboard. Step 2: In the left panel, click on the Settings button.
Robylon1 Pn
Step 3: Within the Settings tab, select Channels.
Robylon2 Pn
Step 4: Click on Chatbot to open its interface.
Robylon3 Pn
Step 5: Now, here in the ‘Interface’ section, you can customize the chat interface and positioning of your chatbot.
Customize1 Pn
Step 6: Then, click on the ‘Styles’ section, where you customize your chatbot’s appearance.
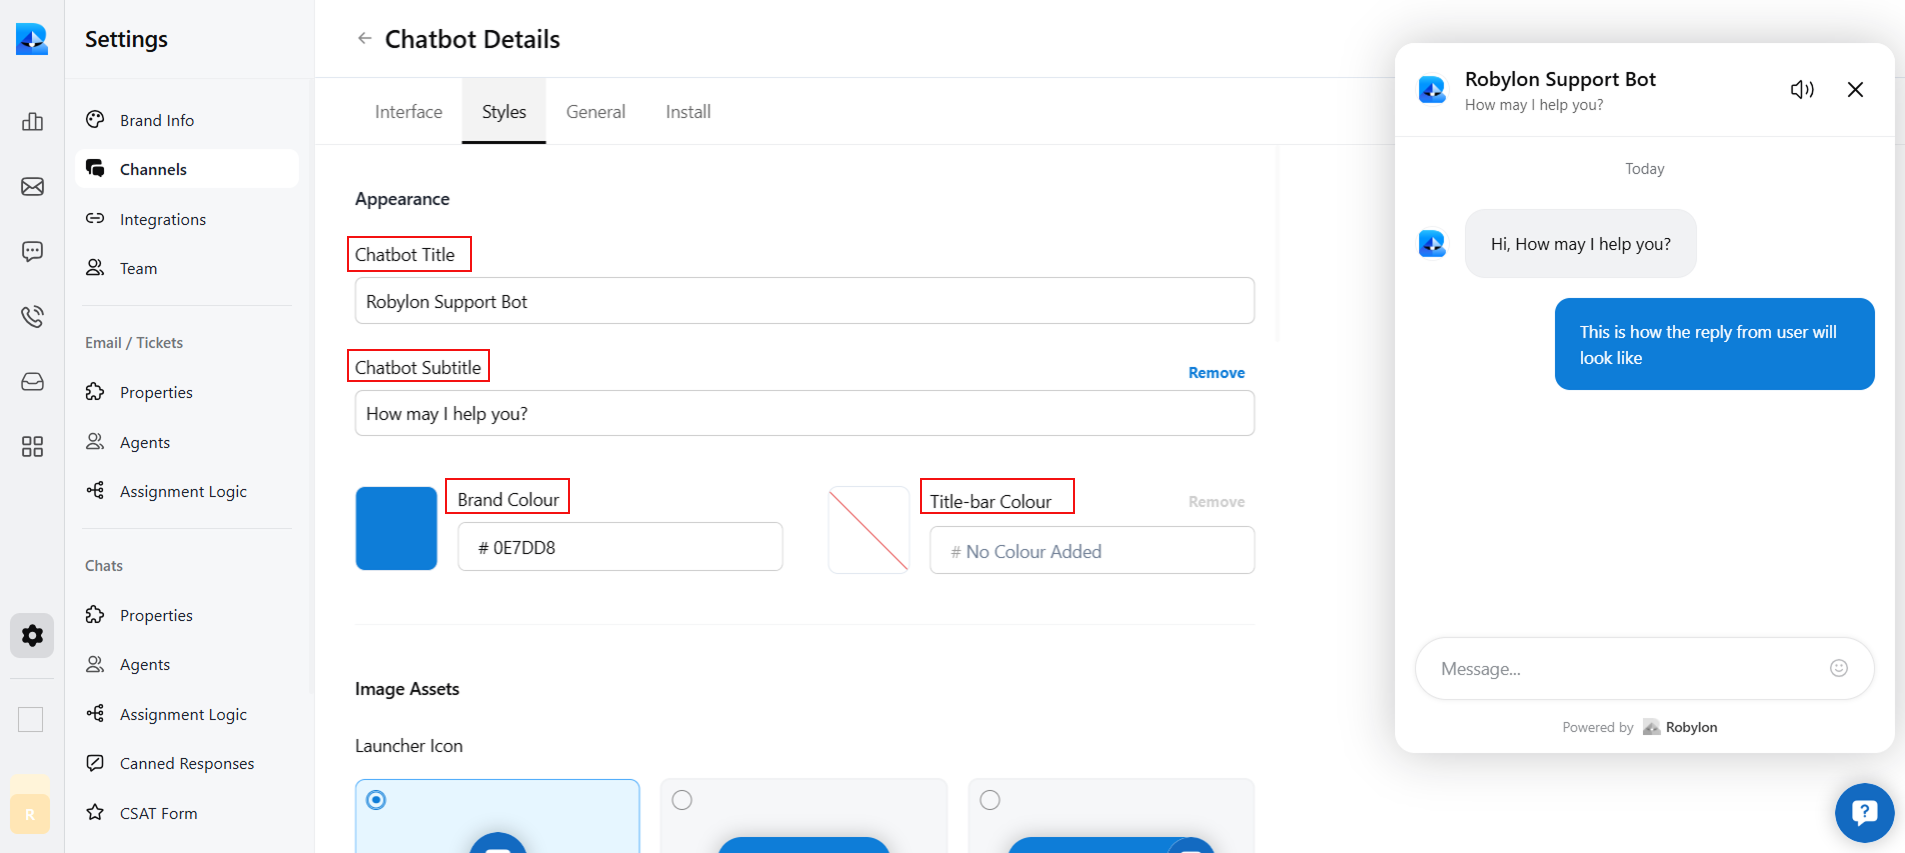
  • In this section, you can edit your chatbot title, subtitle, and colors of your chatbot.
    Customize2 Pn
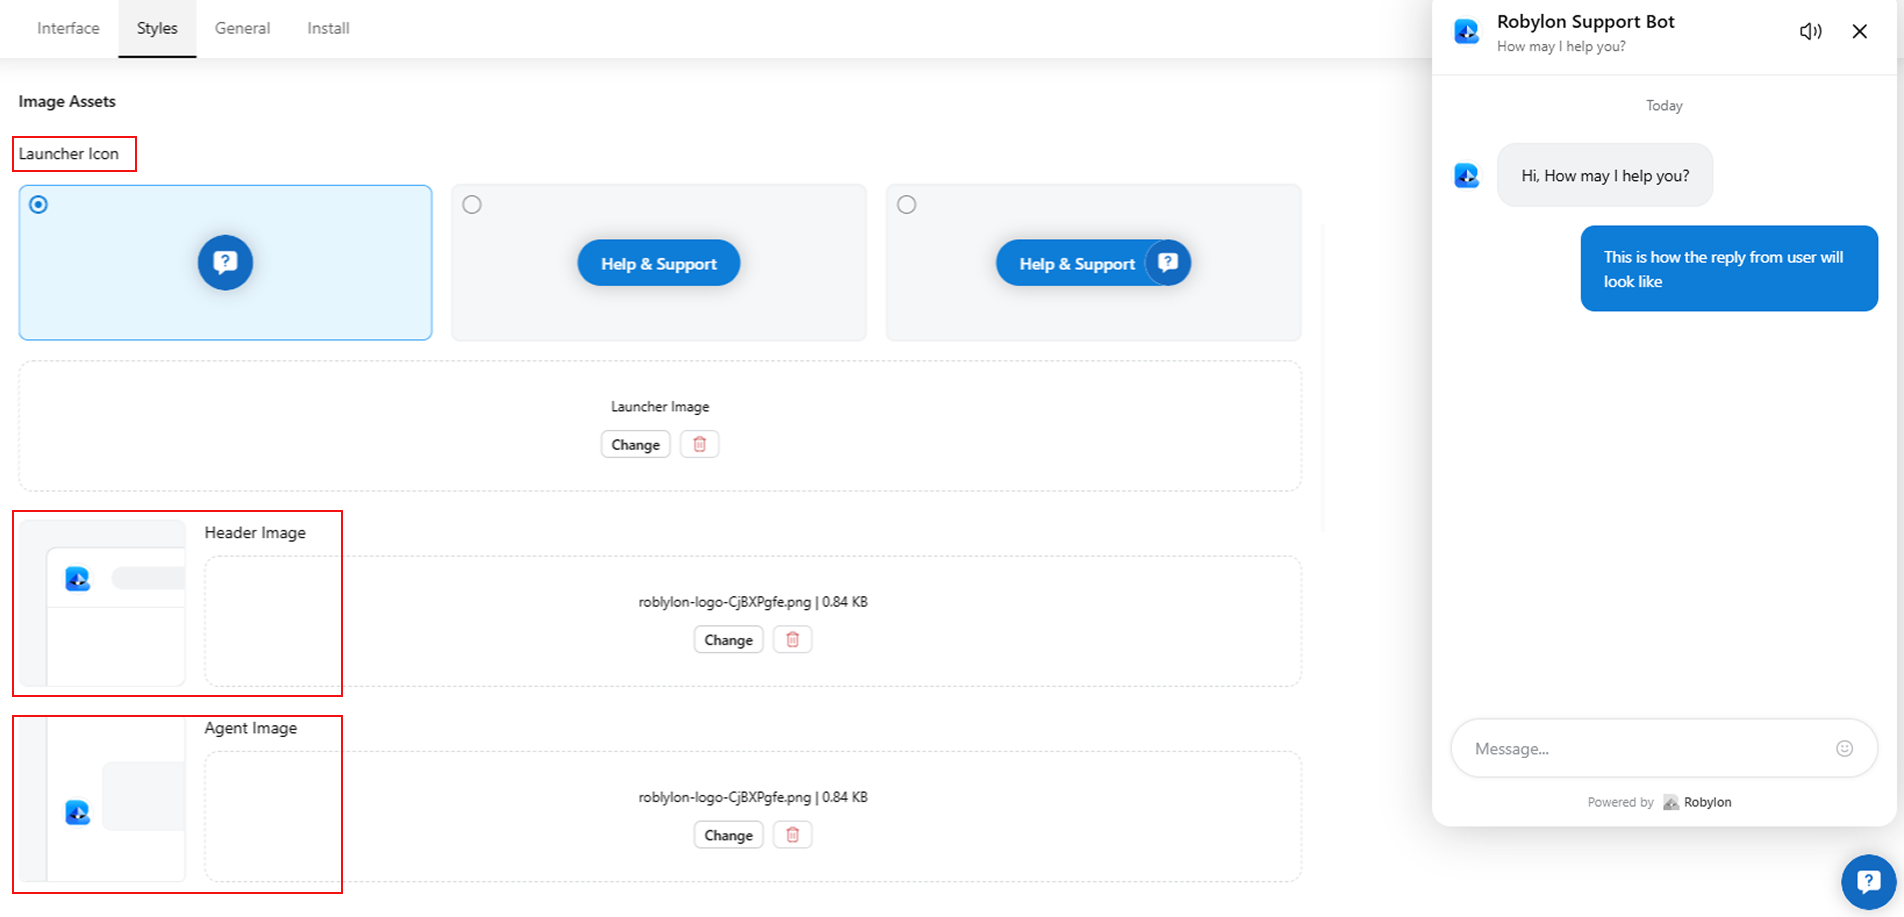
  • Scroll down in this section to customize the image assets of your bot, like the launcher icon, the header image, and the agent image of your bot. 
    Customize3 Pn
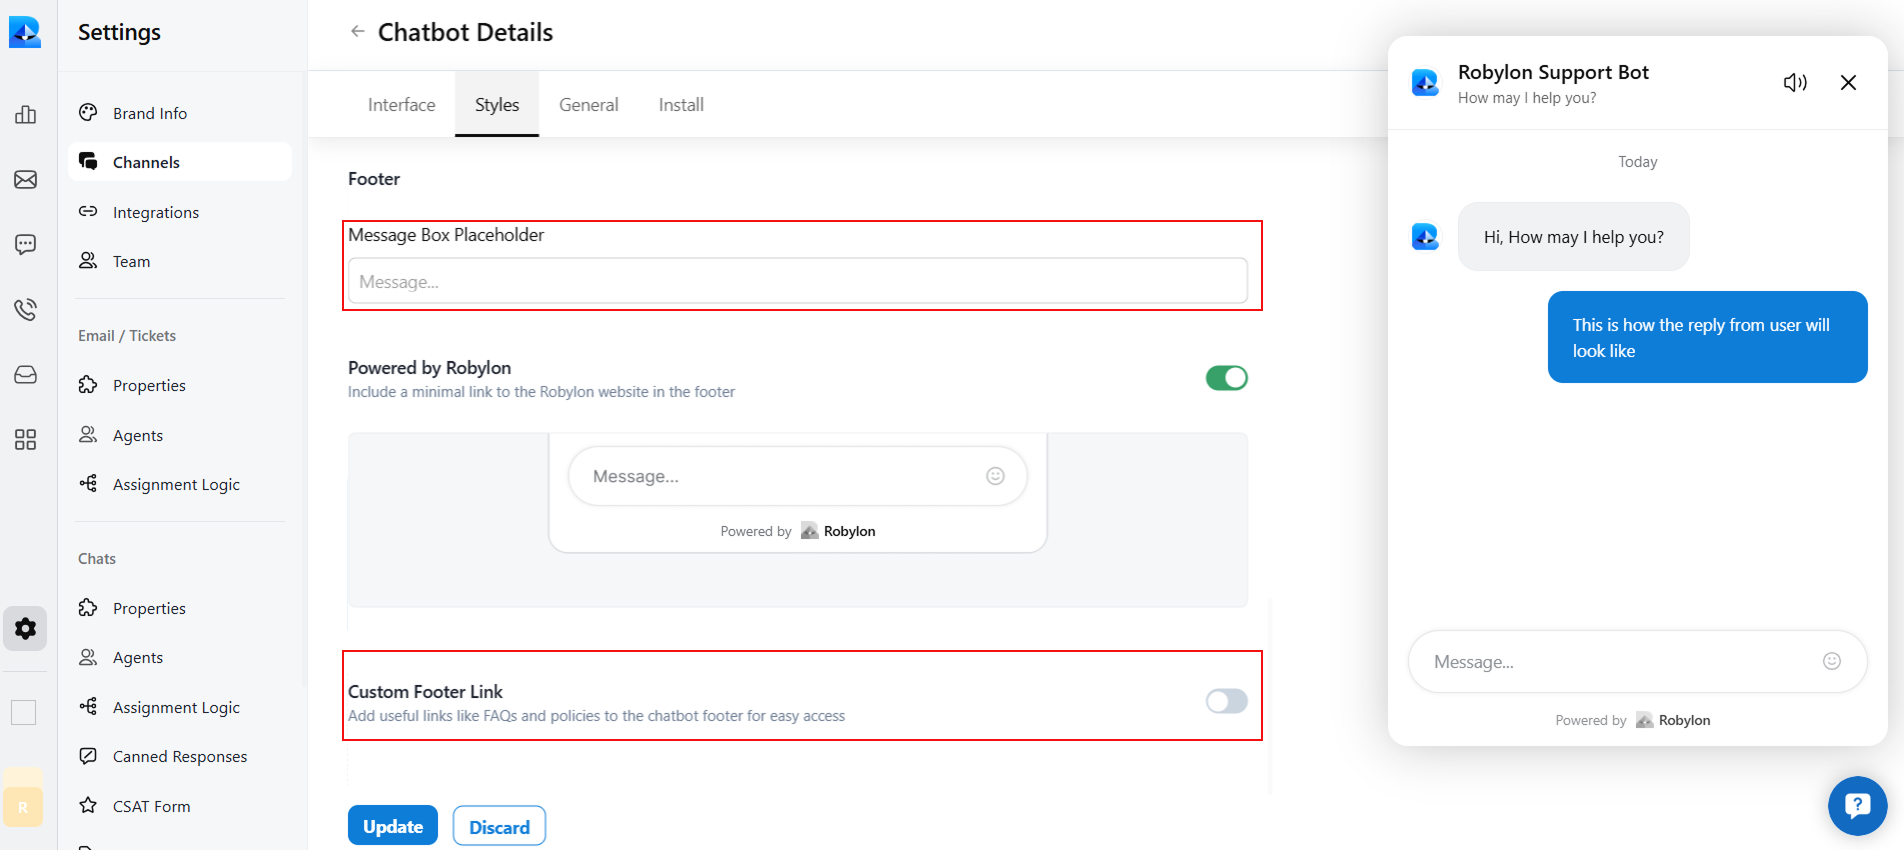
  • Then, scroll down in this section to customize the footer of your chatbot, such as the message box placeholder. You can also add custom footer links in the footer.
    Customize4 Pn
Step 7: Then, click on the ‘General’ section, where you can add an AI Disclaimer and User feedback in your chatbot, also you can add a message sound to your chatbot in this section.
Customize5 Pn
Step 8: After changing every setting in each tab: Interface, Styles, and General, click on the update button in each tab to save your changes.
Customize6 Pn