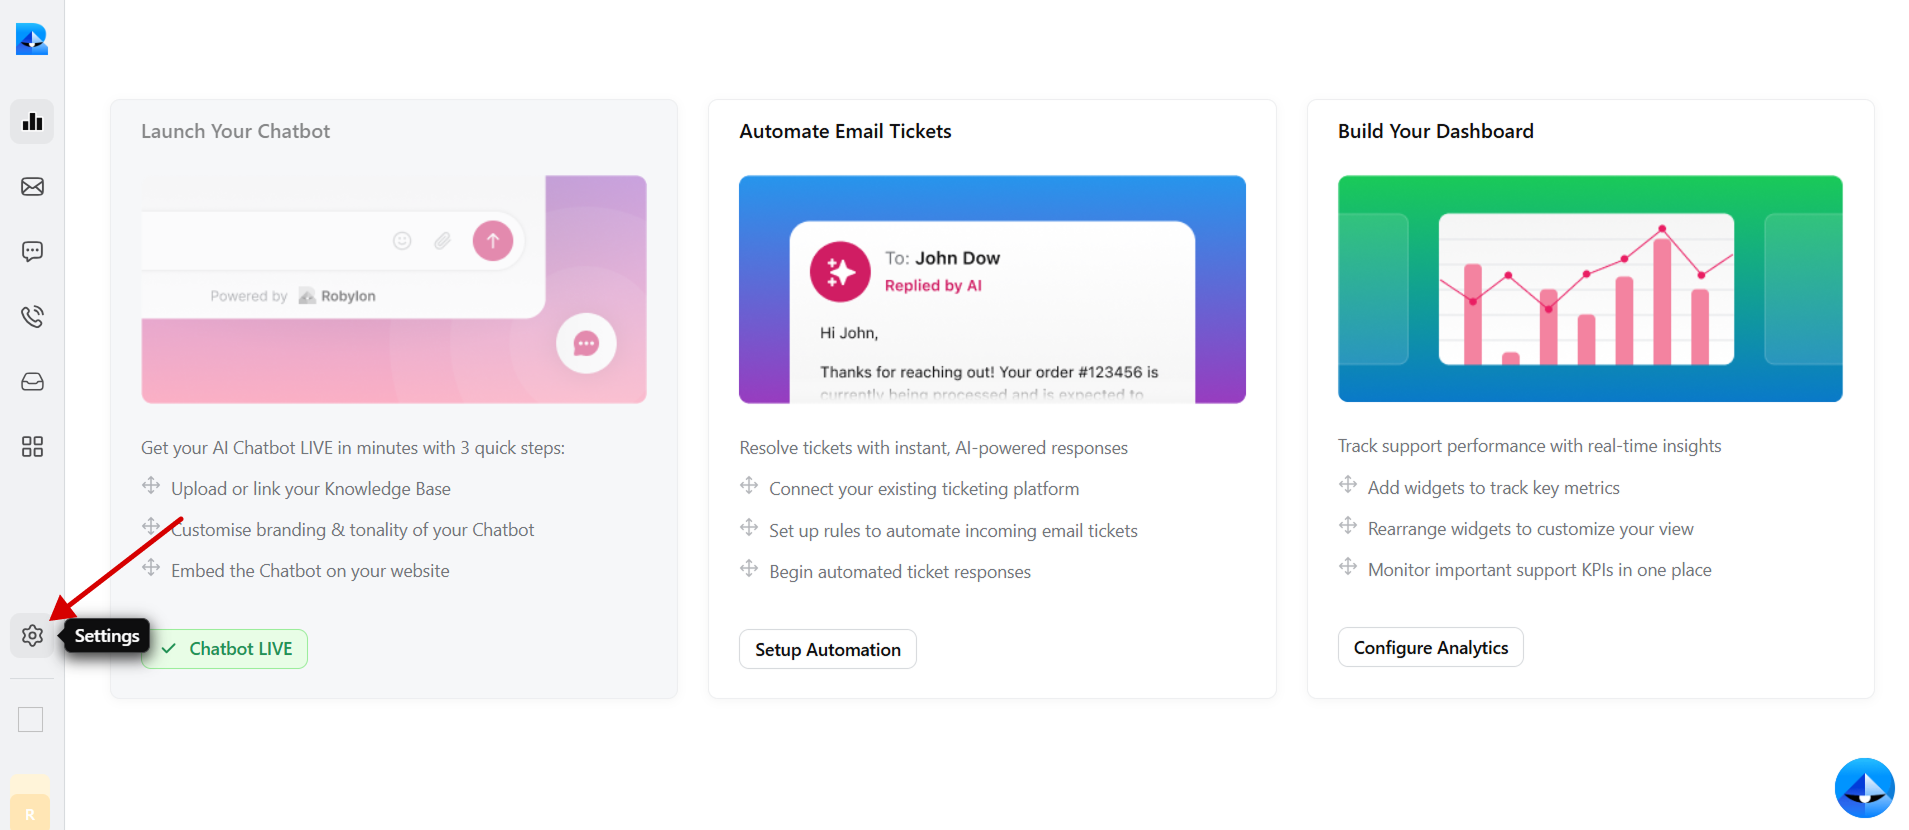
Step 1: Generate and Copy Your Robylon Chatbot Embed Code.
- Log in to your Robylon account and open the dashboard.
-
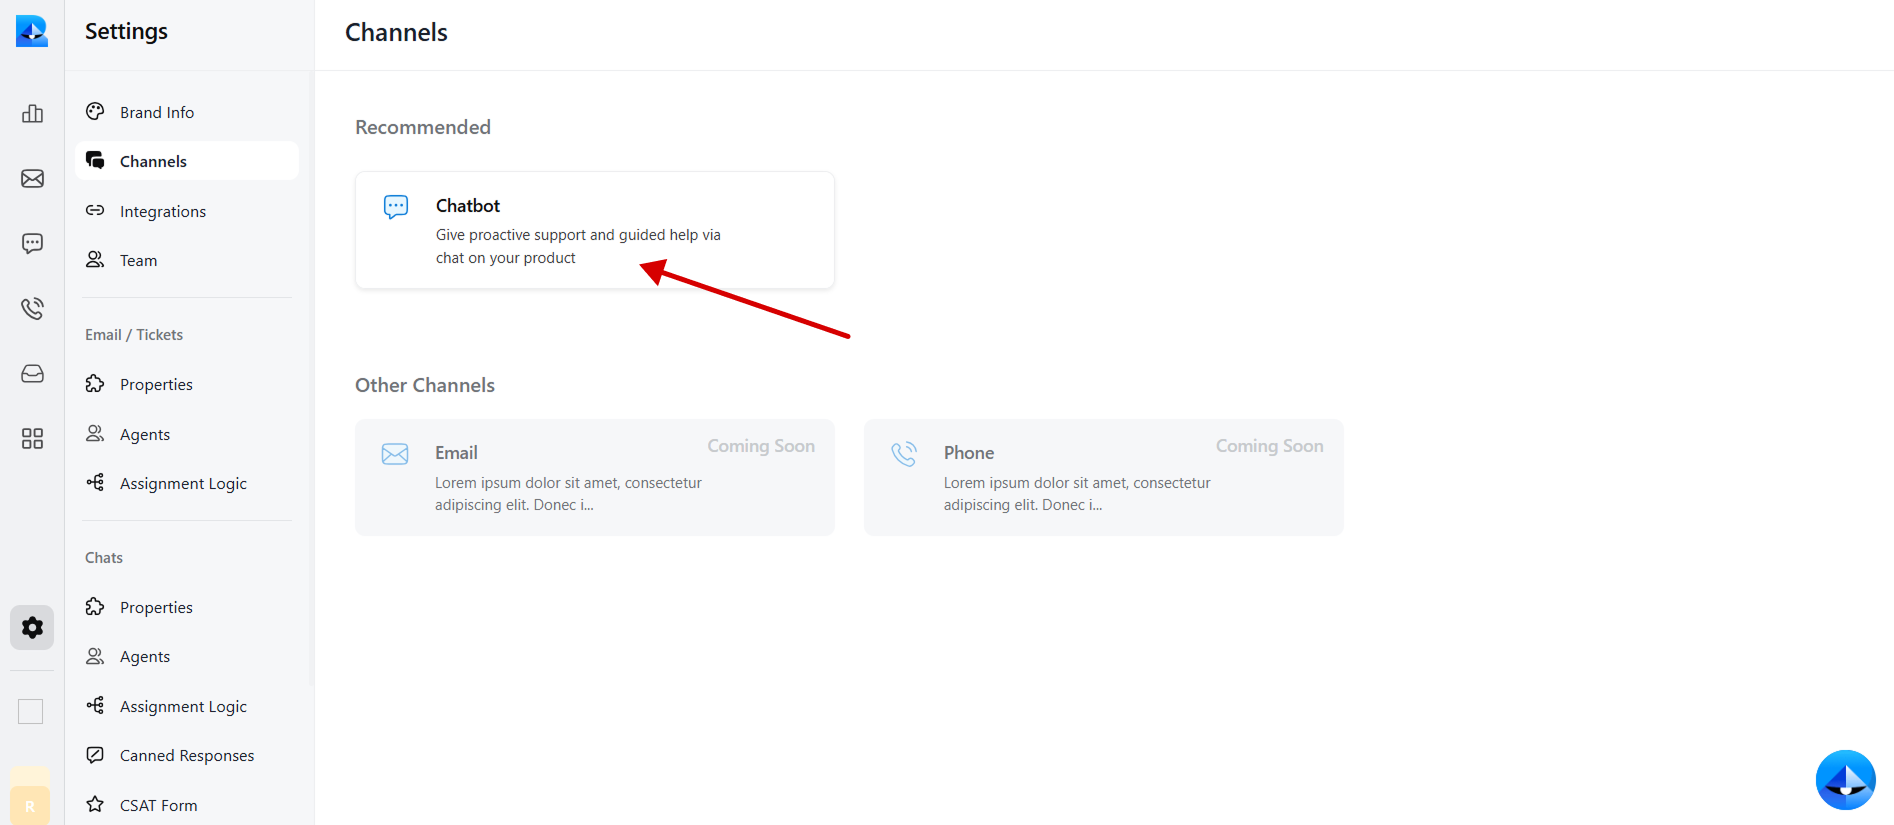
In the left panel, click on the settings button to navigate to the settings page.
-
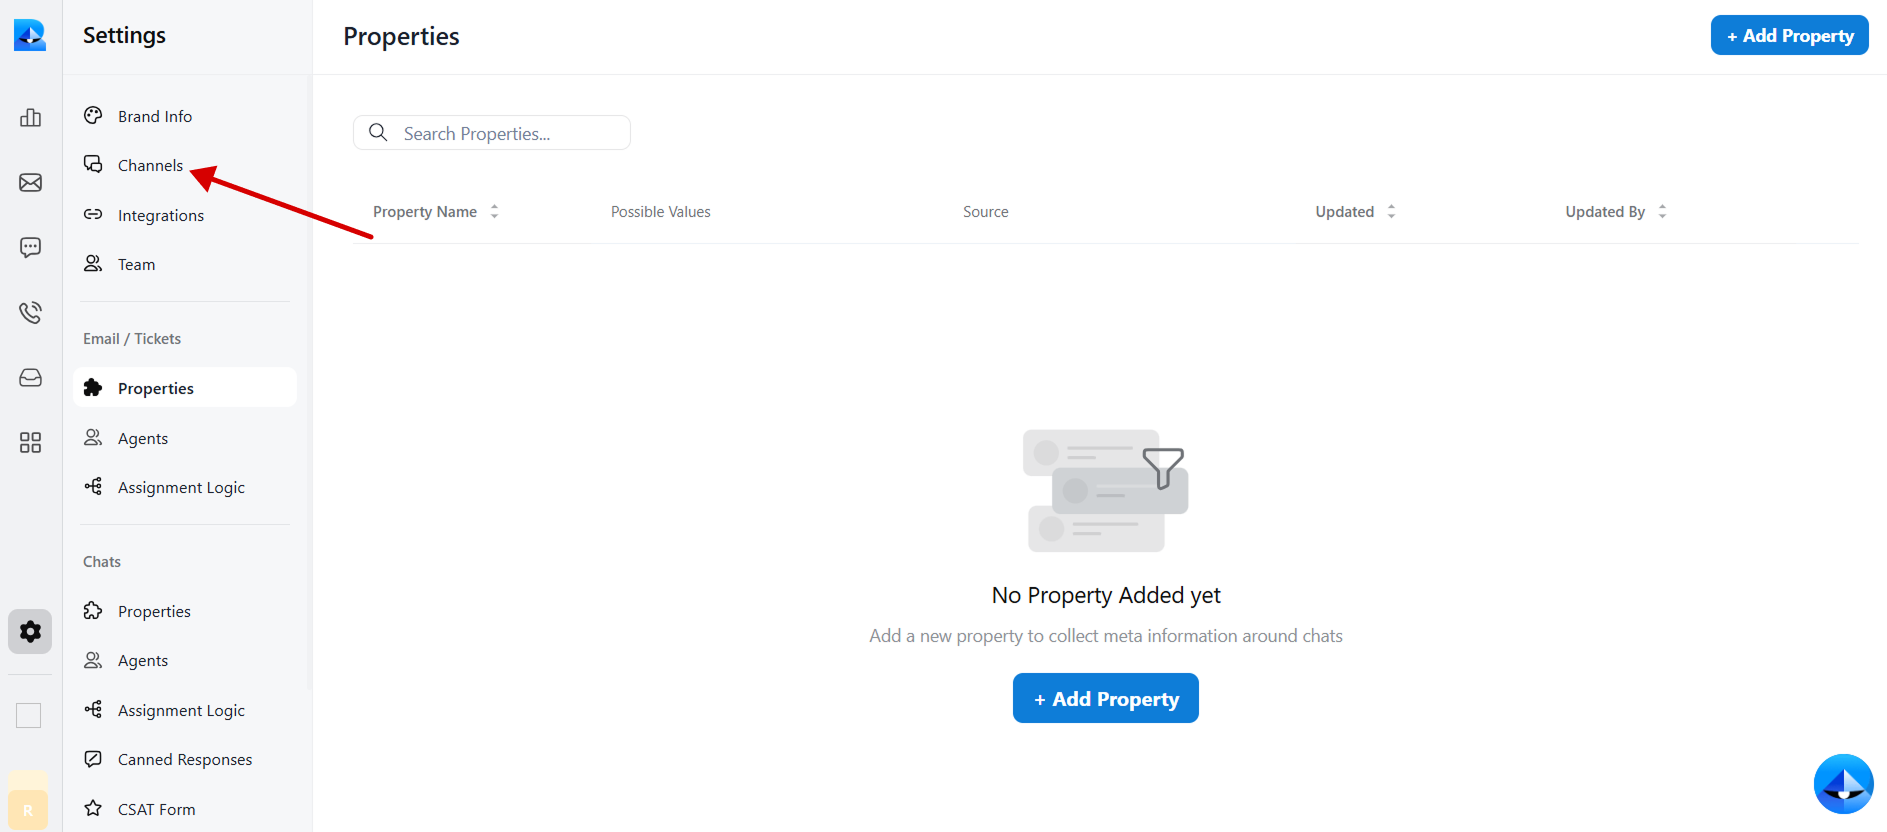
Within the settings tab, select Channels.
-
Click on the Chatbot widget to access the chatbot details.
-
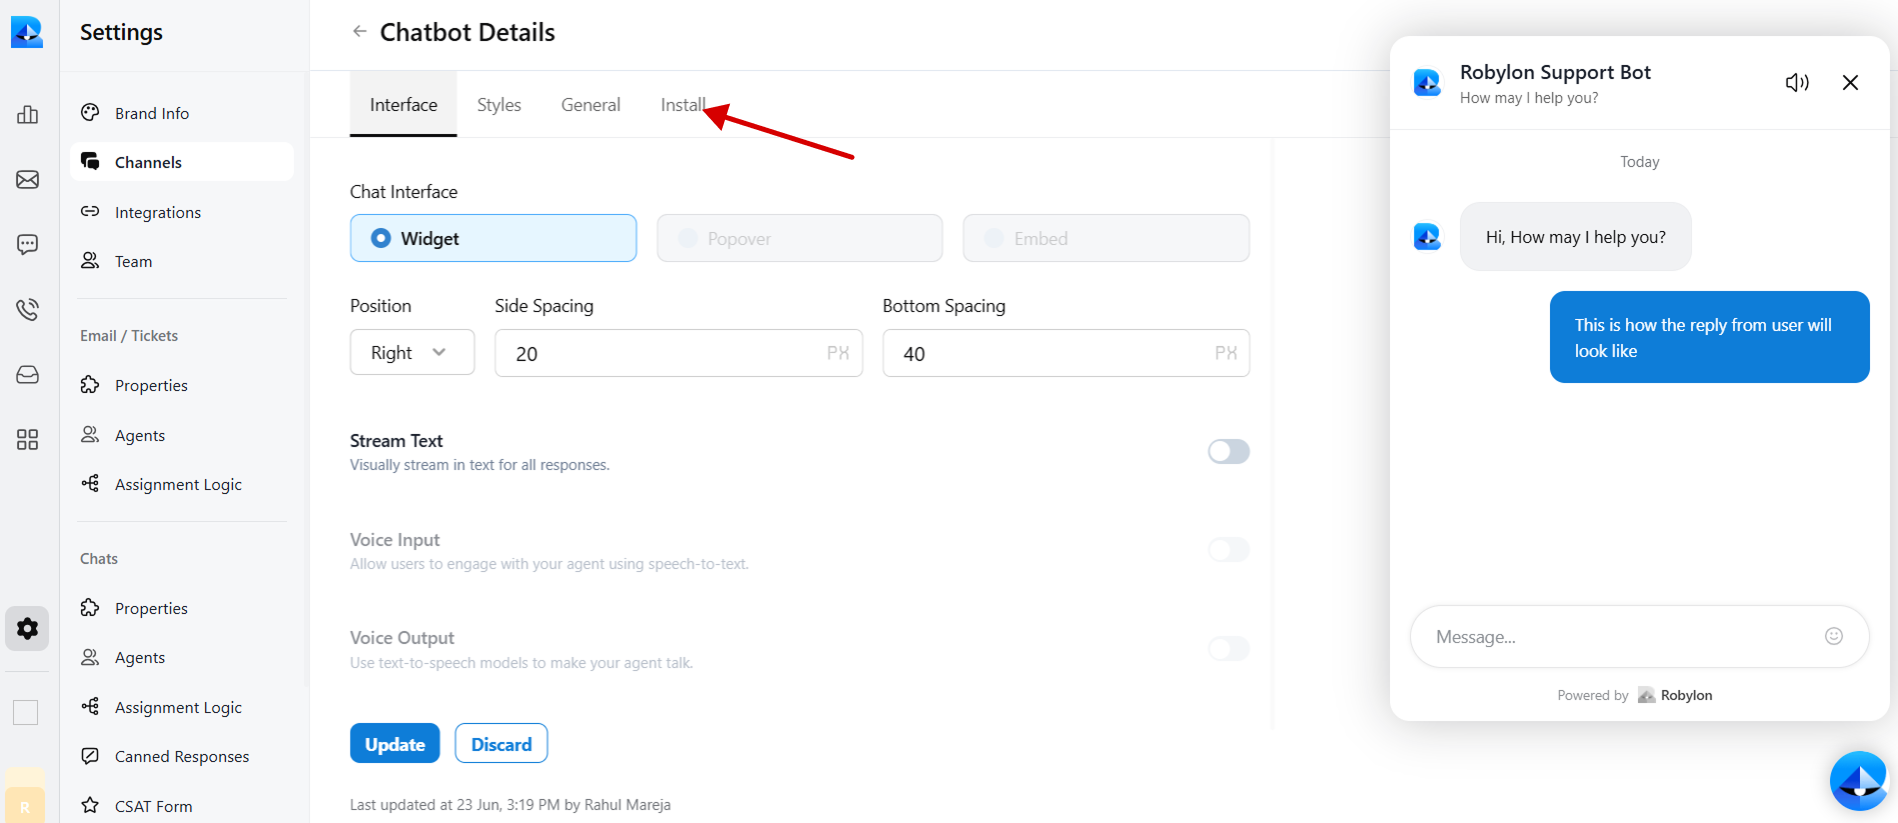
Navigate to the Install tab within the chatbot details page.
-
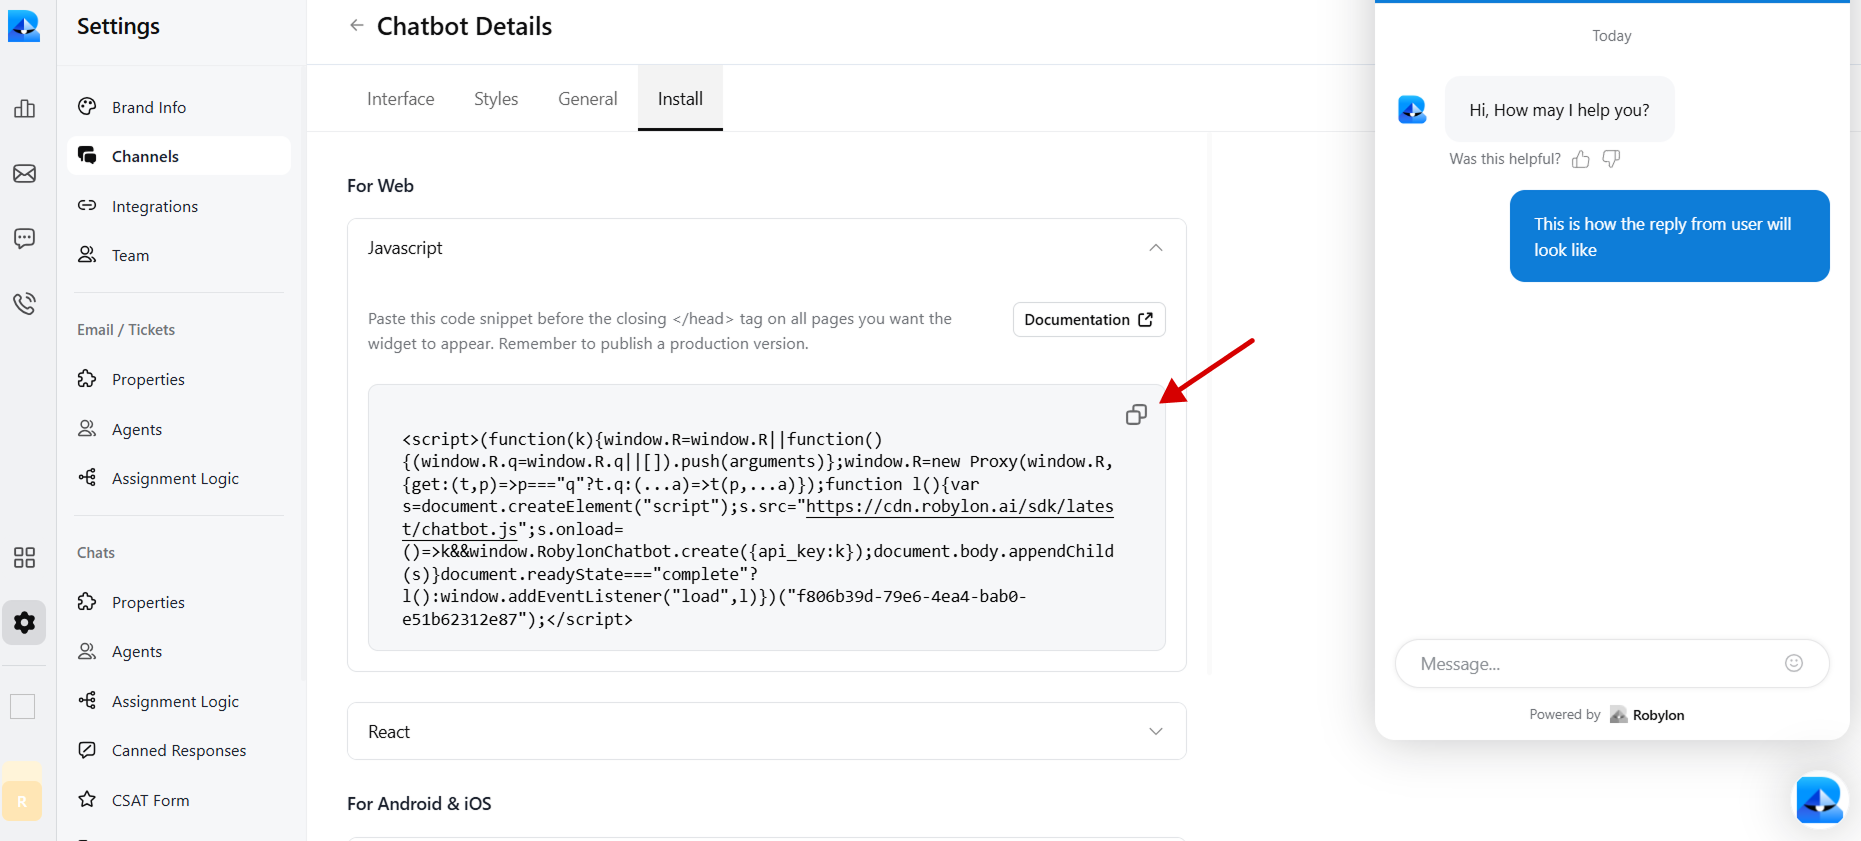
Select JavaScript to embed code in Webflow.

-
Copy the provided chatbot embed code.
Step 2: Embed the code in Webflow to Display Your Chatbot Widget
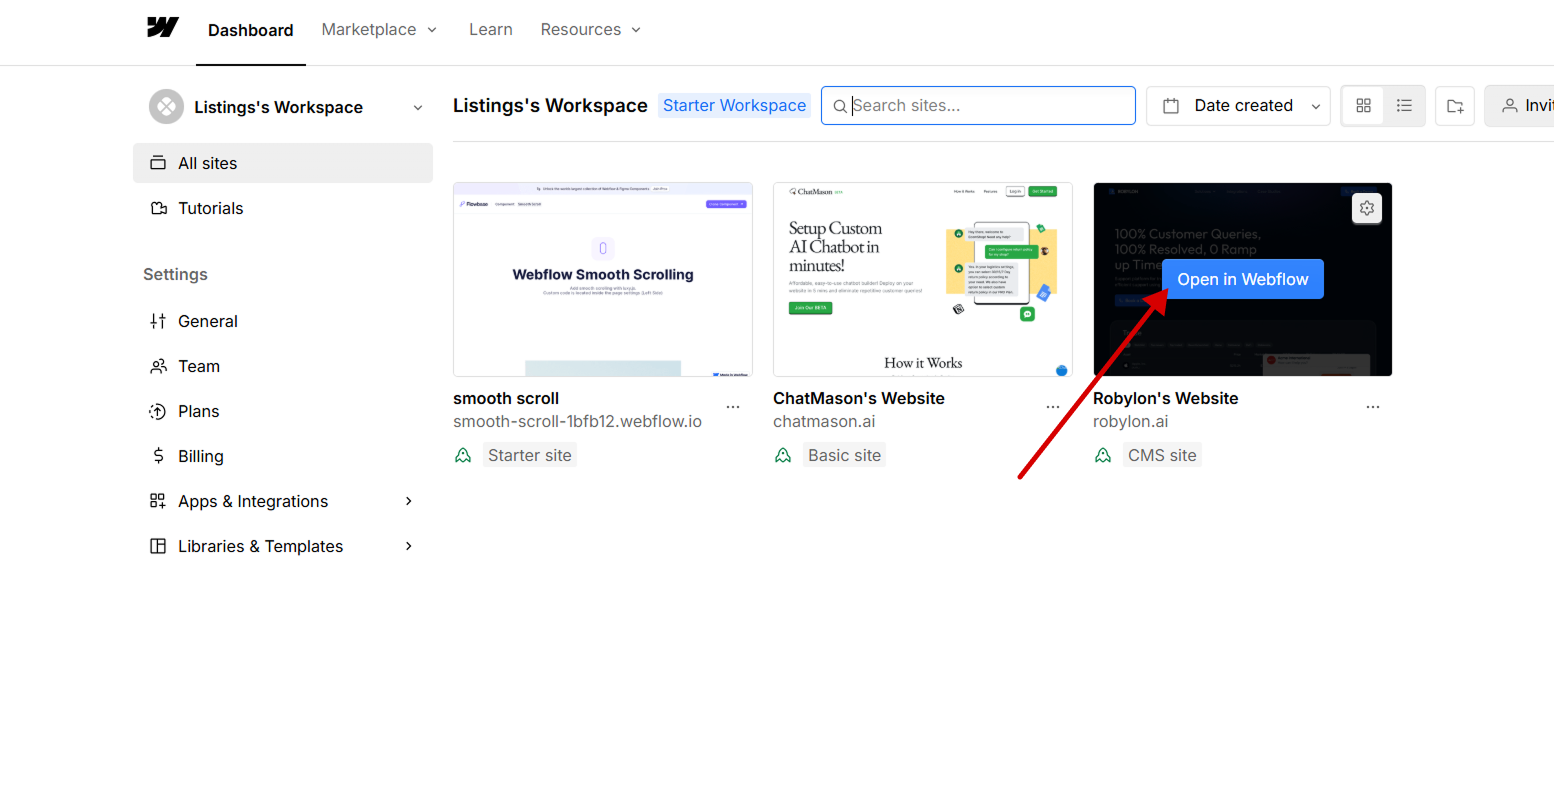
- To embed the code in Webflow, log in to your Webflow account and go to your dashboard.
-
Hover over the website you want to add the chatbot to and click on “Open in Webflow”.
-
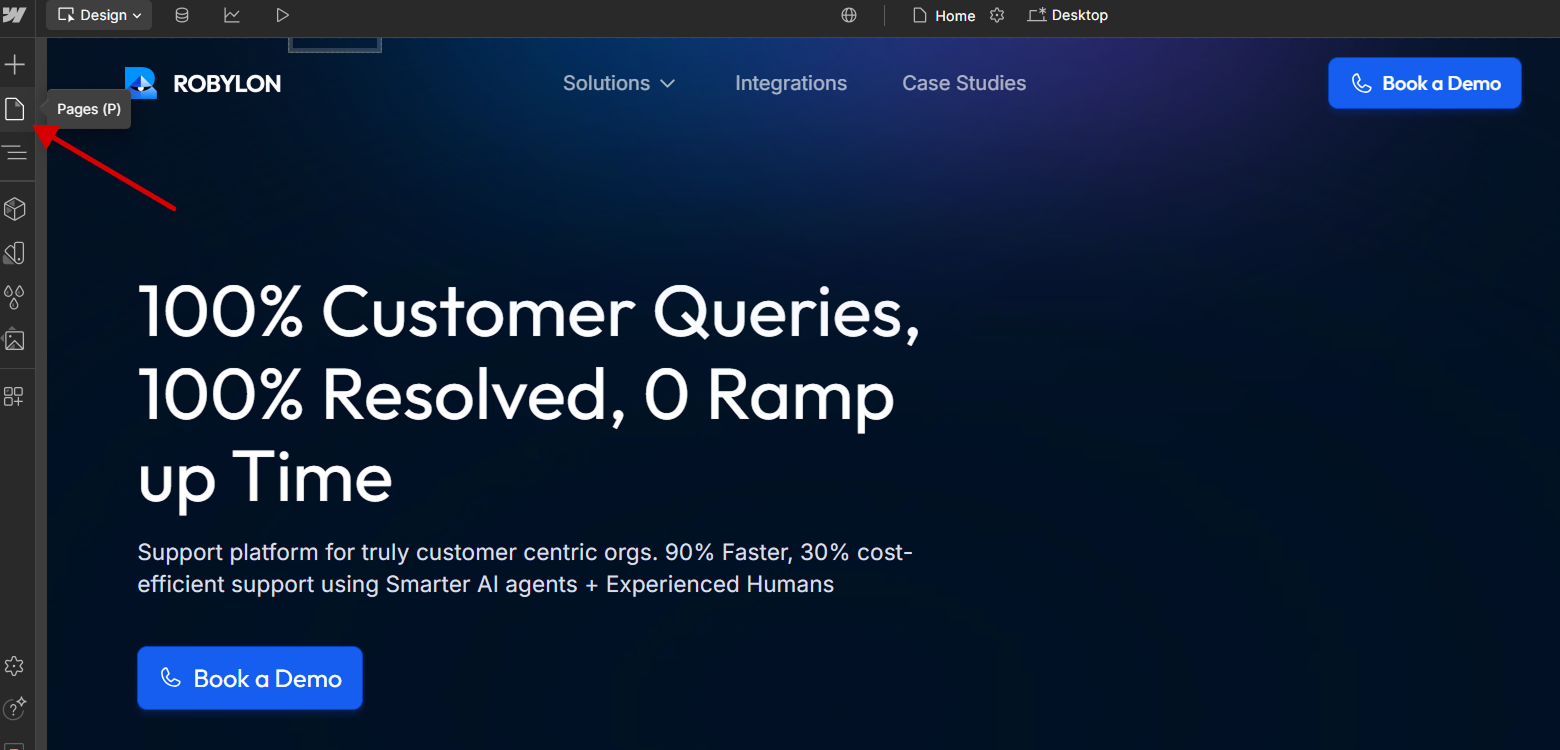
On the designer page, click on the file icon (Pages) in the left navbar of the Webflow site designer.
-
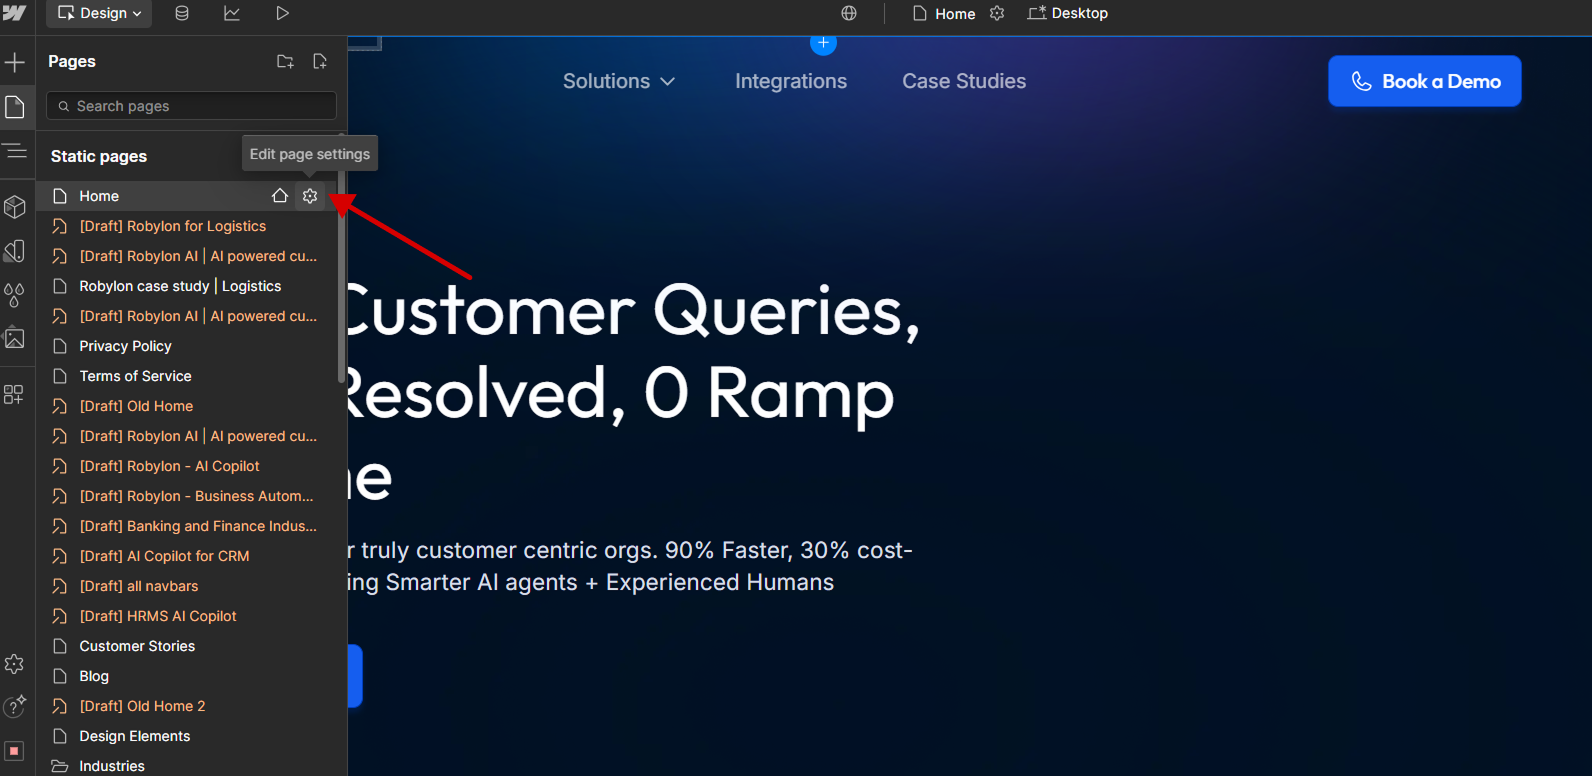
Hover over the page you want to embed the chatbot on and click on the settings icon of that page.
-
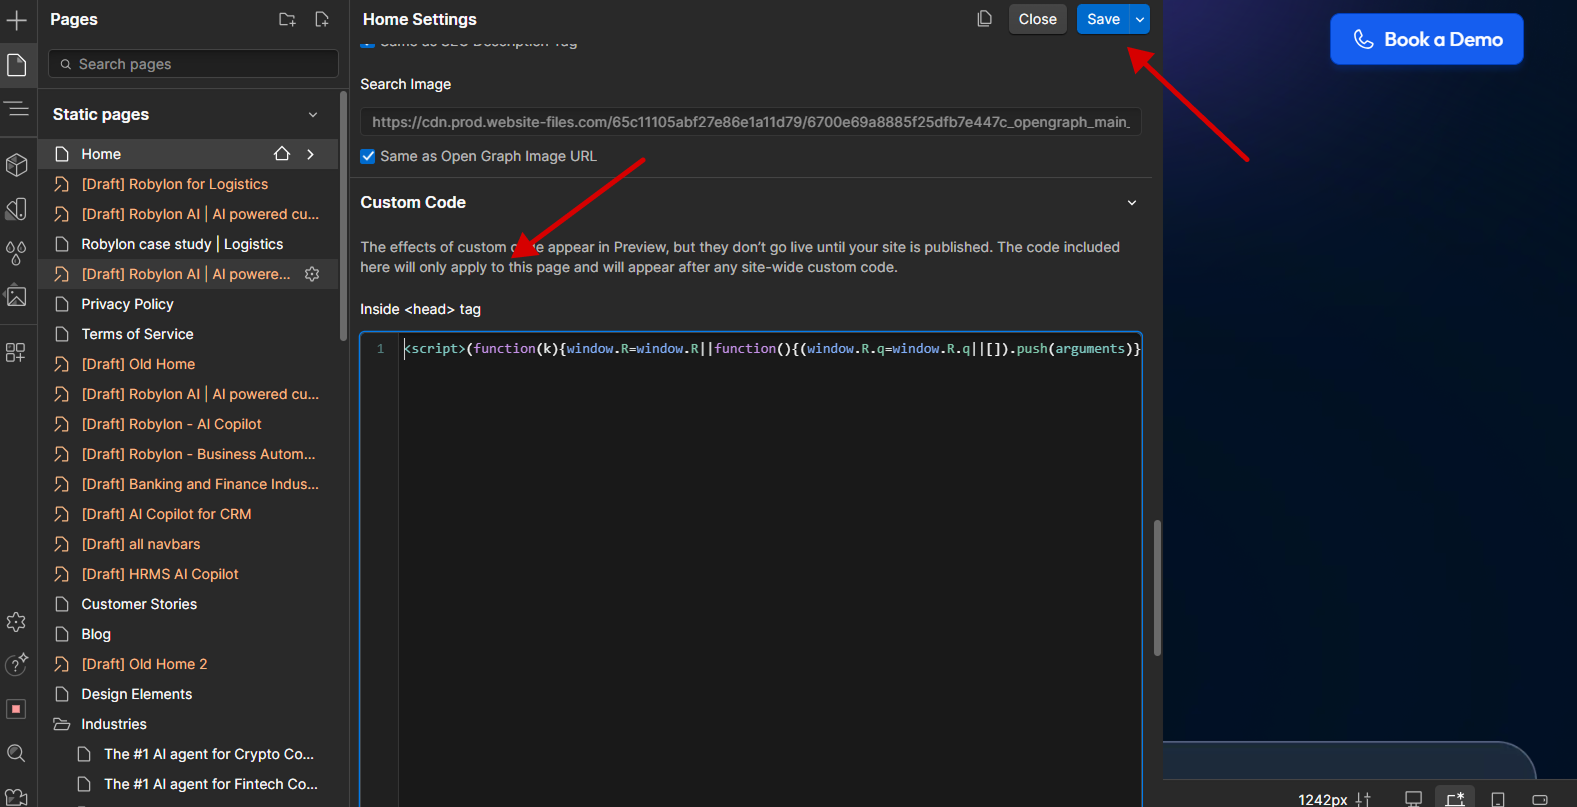
Scroll down in the settings panel of that page till you reach the Custom code section. Paste the Robylon chatbot copied code in the custom code section inside the head tag. Then save the changes.
-
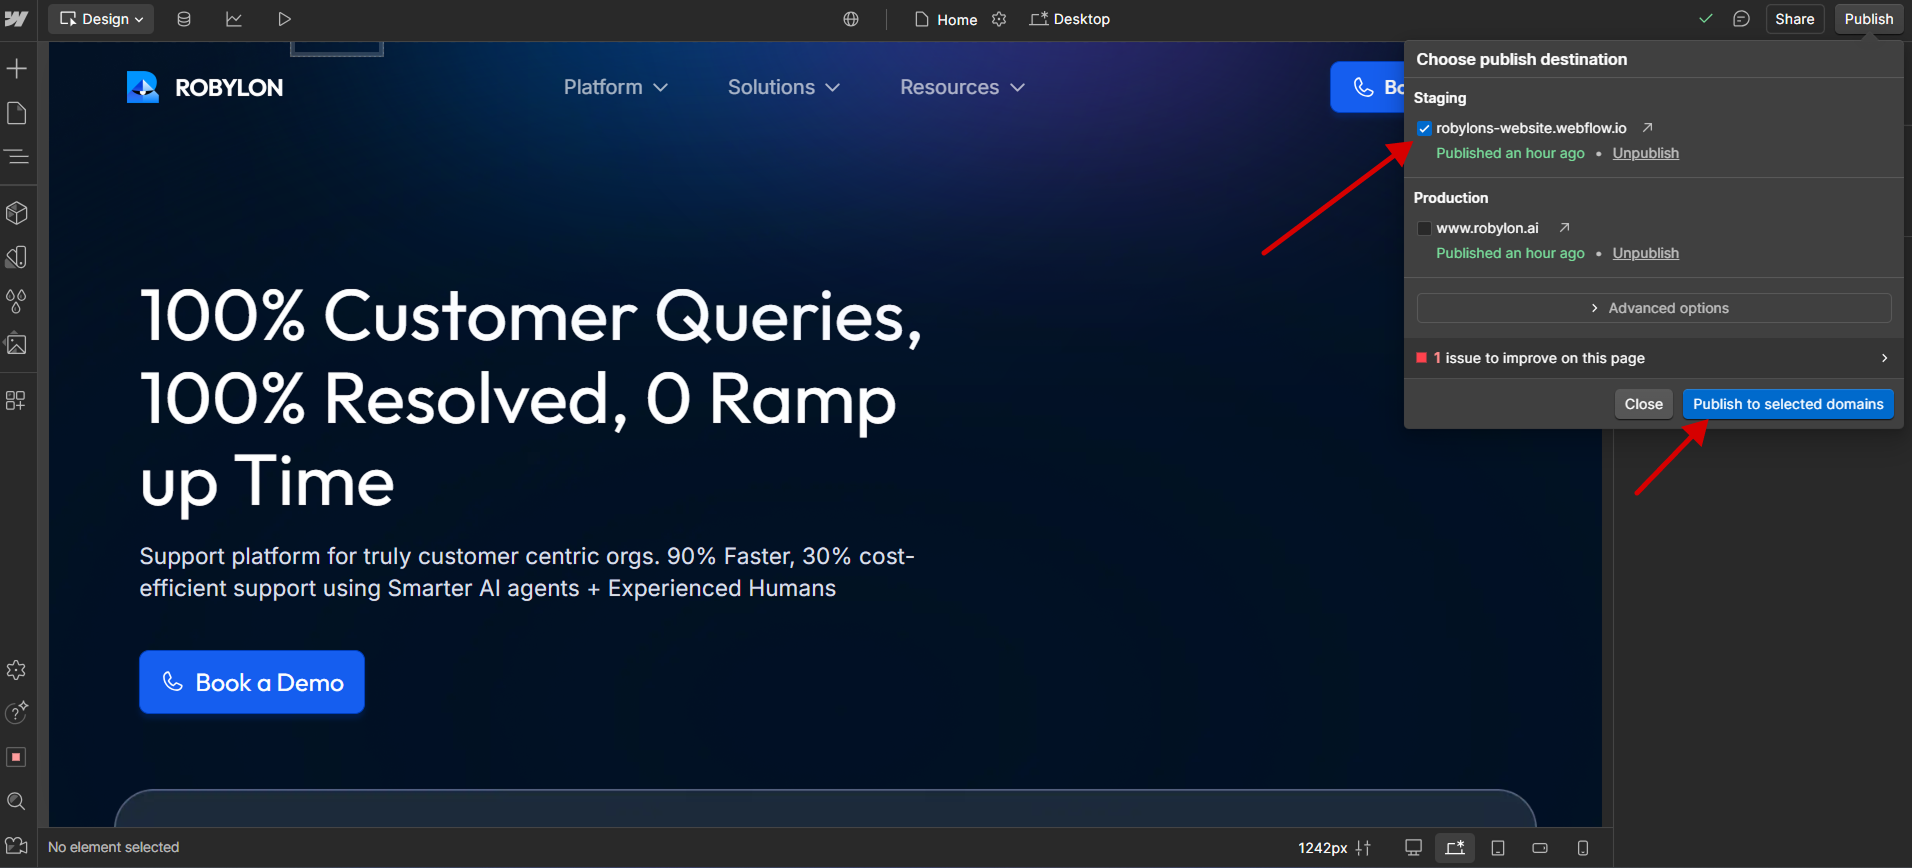
Publish your website for staging to see the chat icon on that page.
-
Test the chatbot to see if it works fine, then you can publish it for production.